

In today’s rapidly evolving IT landscape, automation is the key to streamlining operations and achieving efficiency. Red Hat® Ansible® Automation Platform (AAP) is a comprehensive solution that empowers organizations to configure systems, deploy software, and orchestrate complex workflows. It provides the resources to create, manage, and scale across the entire enterprise.
The Challenge: AWS RDS and SSL Encryption
The AAP installer simplifies the deployment of the PostgreSQL database, making it a seamless process. However, when we opt to use native database solutions, it becomes imperative to ensure a secure database connection. In our case, we’re deploying Red Hat® Ansible® Automation Platform on AWS and leveraging the AWS Relational Database Service (RDS), a managed database solution. The challenge at hand is encrypting the database connection. Given that RDS is managed by AWS, we lack the direct CA bundle configuration options. However, we can enable SSL certificate-based connections, as we’ll explain in the following steps.
Step 1: Create an EC2 Instance
Begin by creating an EC2 instance of your desired size, which will serve as your Ansible controller.
Step 2: Set Up the AWS RDS Instance
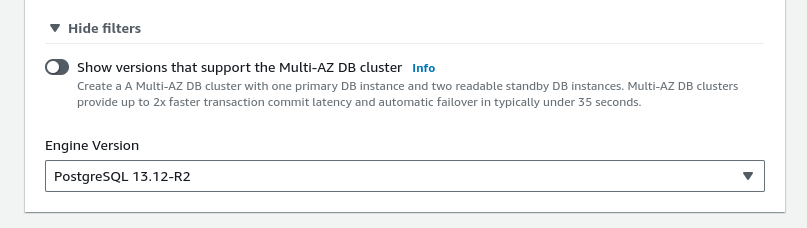
Create an RDS instance with the compatible version.

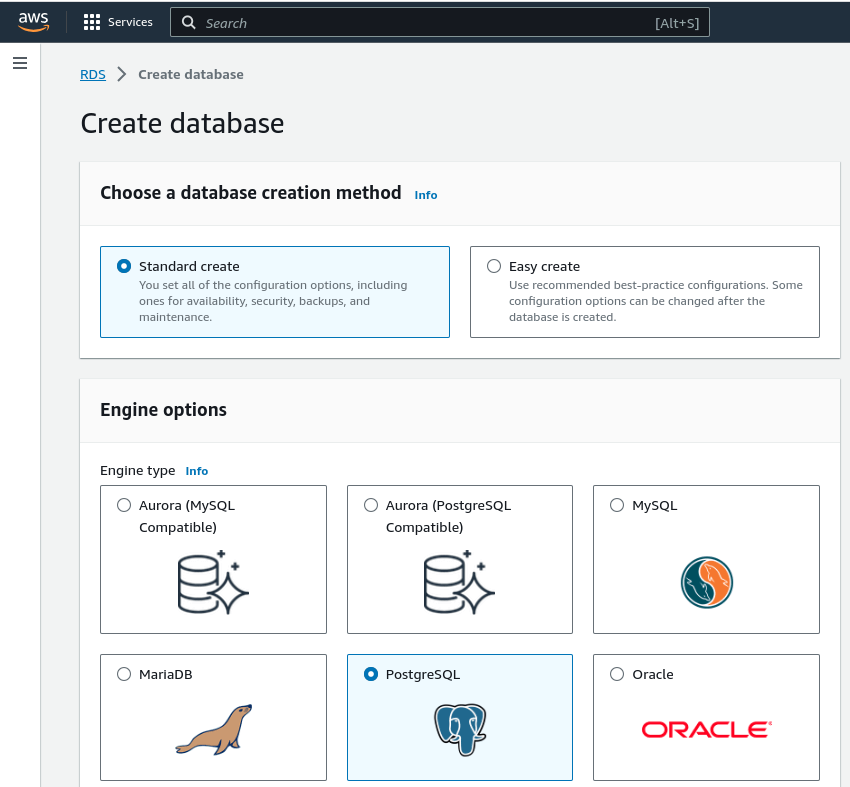
We’ve chosen PostgreSQL 13 for this demonstration.

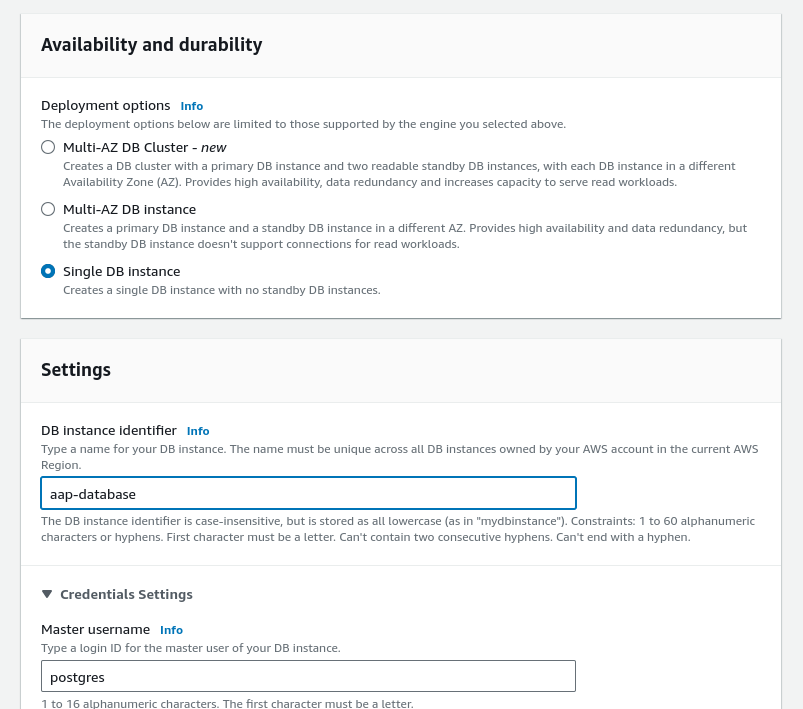
Depending on your needs, you can opt for a Single DB instance or a Multi-AZ DB Cluster for production workloads.

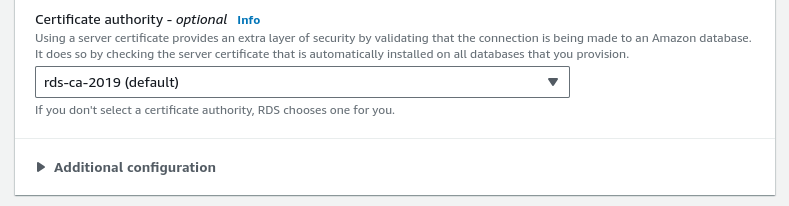
Select the Certificate Authority as needed.

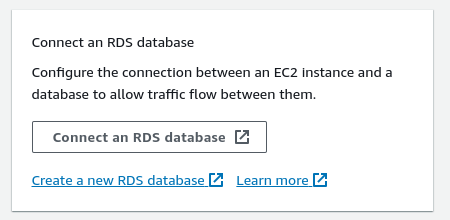
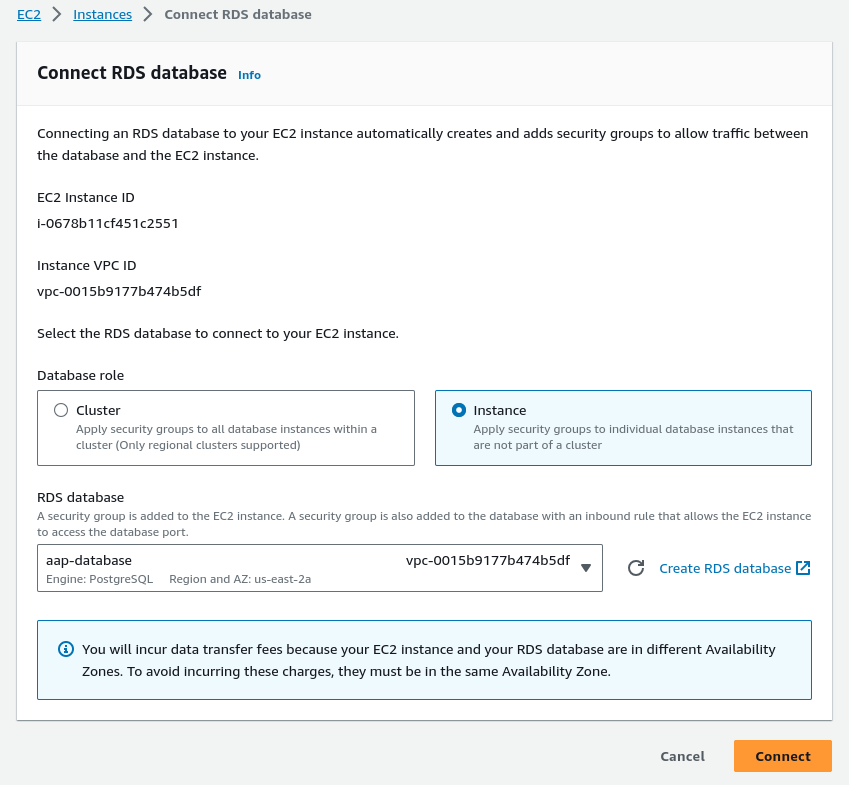
Configure the EC2 instance to RDS connection settings (or enable this security group for access at a later stage).


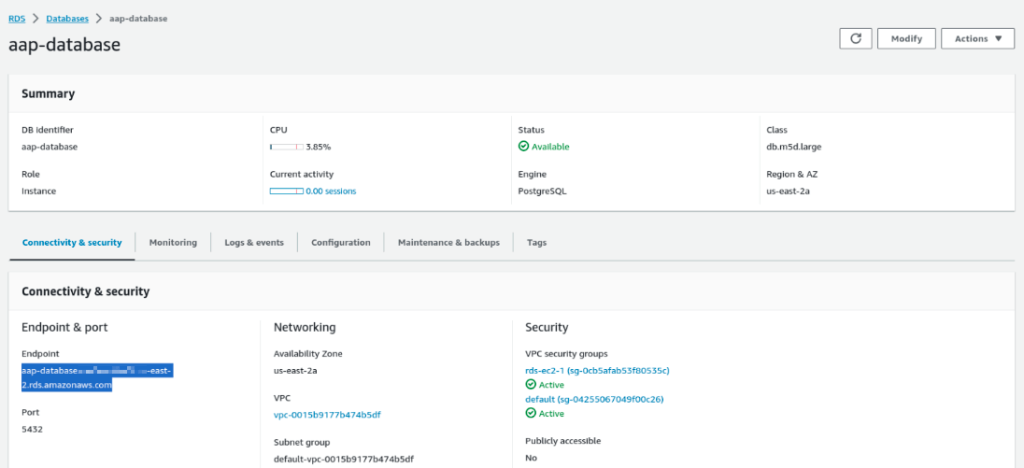
Once the RDS instance is created, you’ll find the connection Endpoint.

Step 3: Download AWS CA Bundle
Download the AWS CA bundle from the provided location, ensuring it matches the region of your instances.
Copy the new CA bundle to /etc/pki/ca-trust/source/anchors/ and update the trust (using sudo update-ca-trust).
$ sudo cp ~/us-east-2-bundle.pem /etc/pki/ca-trust/source/anchors/

$ ls -l /etc/pki/ca-trust/source/anchors/
total 12
-rw-r--r--. 1 root root 2000 Nov  3 10:34 ansible-automation-platform-managed-ca-cert.crt
-rw-r--r--. 1 root root 7492 Nov  5 13:36 us-east-2-bundle.pem

$ sudo update-ca-trust
You can also extract the certificate to view its details if necessary.
$ openssl x509 -outform der -in yourPemFilename.pem -out certfileOutName.crt
$ openssl rsa -in yourPemFilename.pem -out keyfileOutName.key
Step 4: Update the CA Certificate in RDS Instance
This can be done from the AWS Console.


Step 5: Test the Database Connection
From your EC2 instance (acting as the Ansible controller), test the SSL-encrypted database connection.
$ psql "host=aap-database.<removed>.us-east-2.rds.amazonaws.com  port=5432  user=postgres sslrootcert=/home/ec2-user/us-eas
t-2-bundle.pem sslmode=verify-full"
Password for user postgres:
psql (13.11, server 13.12)
SSL connection (protocol: TLSv1.2, cipher: ECDHE-RSA-AES256-GCM-SHA384, bits: 256, compression: off)
Type "help" for help.

postgres=>
You can also troubleshoot the connection with SSL as needed.
$ openssl s_client -CAfile /root/.postgresql/root.crt -connect  aap-database.<removed>.us-east-2.rds.amazonaws.com:5432 </dev/null
80ABA949517F0000:error:8000000D:system library:BIO_new_file:Permission denied:crypto/bio/bss_file.c:67:calling fopen(/root/.postgresql/root.crt, r)
80ABA949517F0000:error:10080002:BIO routines:BIO_new_file:system lib:crypto/bio/bss_file.c:77:
80ABA949517F0000:error:05880002:x509 certificate routines:X509_load_cert_crl_file_ex:system lib:crypto/x509/by_file.c:228:
Step 6: Manually Create a Database
Using the psql utility, manually create a database. Install the psql client if it’s not already installed (use sudo yum install PostgreSQL).
$ psql -h aap-database.<removed>.us-east-2.rds.amazonaws.com -U  postgres

postgres=>

postgres=> CREATE DATABASE awx;
CREATE DATABASE
postgres=> \l
                                  List of databases
   Name    |  Owner   | Encoding |   Collate   |    Ctype    |   Access privileges
-----------+----------+----------+-------------+-------------+-----------------------
 awx       | postgres | UTF8     | en_US.UTF-8 | en_US.UTF-8 |
 postgres  | postgres | UTF8     | en_US.UTF-8 | en_US.UTF-8 |
 rdsadmin  | rdsadmin | UTF8     | en_US.UTF-8 | en_US.UTF-8 | rdsadmin=CTc/rdsadmin+
           |          |          |             |             | rdstopmgr=Tc/rdsadmin
 template0 | rdsadmin | UTF8     | en_US.UTF-8 | en_US.UTF-8 | =c/rdsadmin          +
           |          |          |             |             | rdsadmin=CTc/rdsadmin
 template1 | postgres | UTF8     | en_US.UTF-8 | en_US.UTF-8 | =c/postgres          +
           |          |          |             |             | postgres=CTc/postgres
(5 rows)
Step 7: Download the Ansible Automation Platform Installation Package
You can access the Ansible Automation Platform installation package on Red Hat’s website. Choose either the simple installer or bundle based on your network environment.
Step 8: Extract the Installer
Extract the Ansible Automation Platform installer from the downloaded package.
$ tar xvzf ansible-automation-platform-setup-bundle-<latest-version>.tar.gzStep 9: Update the Inventory
Update the inventory according to your deployment needs. In this article, we’re demonstrating the Ansible controller installation, skipping other variables.
[automationcontroller]
aap-node-101 ansible_connection=local

[automationcontroller:vars]
peers=execution_nodes

[database]
# this section should be blank,
# as the installer will not deploy any database server.

[all:vars]
admin_password='aapadmin'

pg_host=aap-database.<removed>.us-east-2.rds.amazonaws.com
pg_port=5432

pg_database='awx'
pg_username='postgres'
pg_password='Mko0(ijnBhu8'
pg_sslmode='verify-full'  # set to 'verify-full' for client-side enforced SSL
Step 10: Run the Setup Script
Execute the setup.sh script to install Ansible.
$ ANSIBLE_BECOME_METHOD=sudo ANSIBLE_BECOME=True ./setup.shWait for the installation to finish.
PLAY RECAP *********************************************************************
aap-node-101               : ok=318  changed=56   unreachable=0    failed=0    skipped=236  rescued=0    ignored=3
localhost                  : ok=0    changed=0    unreachable=0    failed=0    skipped=1    rescued=0    ignored=0

The setup process completed successfully.
Step 11: Verify SSL Connection
Once the setup is complete, verify the SSL connection in the configuration.
$ sudo cat /etc/tower/conf.d/postgres.py
# Ansible Automation Platform controller database settings.

DATABASES = {
   'default': {
       'ATOMIC_REQUESTS': True,
       'ENGINE': 'awx.main.db.profiled_pg',
       'NAME': 'awx',
       'USER': 'postgres',
       'PASSWORD': """mysecretdbpassword""",
       'HOST': 'aap-database.<removed>.us-east-2.rds.amazonaws.com',
       'PORT': '5432',
       'OPTIONS': { 'sslmode': 'prefer',
                    'sslrootcert': '/home/ec2-user/us-east-2-bundle.pem',
       },
   }
}
Step 12: Access the WebUI
You’re now ready to access the Ansible Automation Platform’s WebUI.

Congratulations, you’ve successfully deployed Red Hat® Ansible® Automation Platform with AWS RDS and SSL encryption, enabling secure and efficient automation for your organization.
Troubleshooting
Error: unable to connect to database: root certificate file \"/root/.postgresql/root.crt\" does not exist
TASK [ansible.automation_platform_installer.preflight : Preflight check - Ensure User-Provided Postgres Instance is at Version 12 or Higher] ***
fatal: [aap-node-101]: FAILED! => {"changed": false, "msg": "unable to connect to database: root certificate file \"/root/.postgresql/root.crt\" does not exist\nEither provide the file or change sslmode to disable server certificate verification.\n"}
This is a known issue and refer to the Red Hat KB for more details.