

Introduction
Red Hat Satellite is one of the best system management solutions by which you can deploy, configure, and maintain your systems; it can be physical, virtual, or cloud environments. Satellite is single pane tool for provisioning, remote management and monitoring of multiple Red Hat Enterprise Linux deployments.
Red Hat Satellite Server – Installation Guides
- Red Hat Satellite Server – Connected Installation Method – Part 1 – Prepare Server
- Red Hat Satellite Server – Connected Installation Method – Part 2 – Configure Satellite
- Red Hat Satellite Server – Disconnected Installation Method – Part 1 – Prepare Server
- Red Hat Satellite Server – Disconnected Installation Method – Part 2 – Configure Satellite
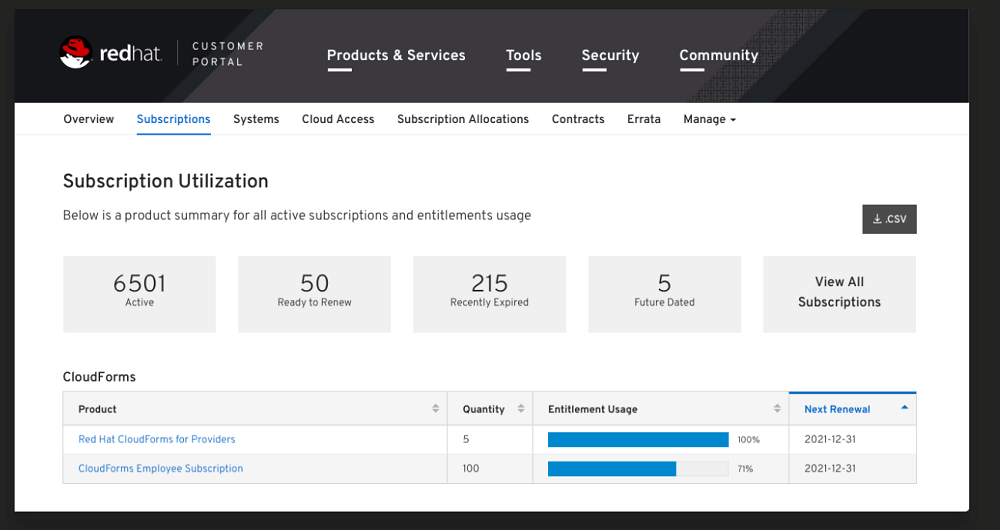
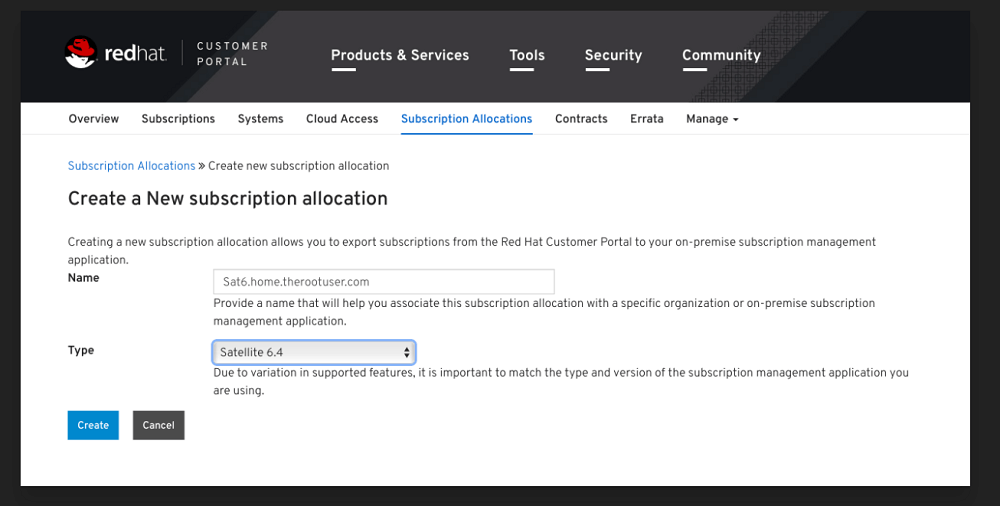
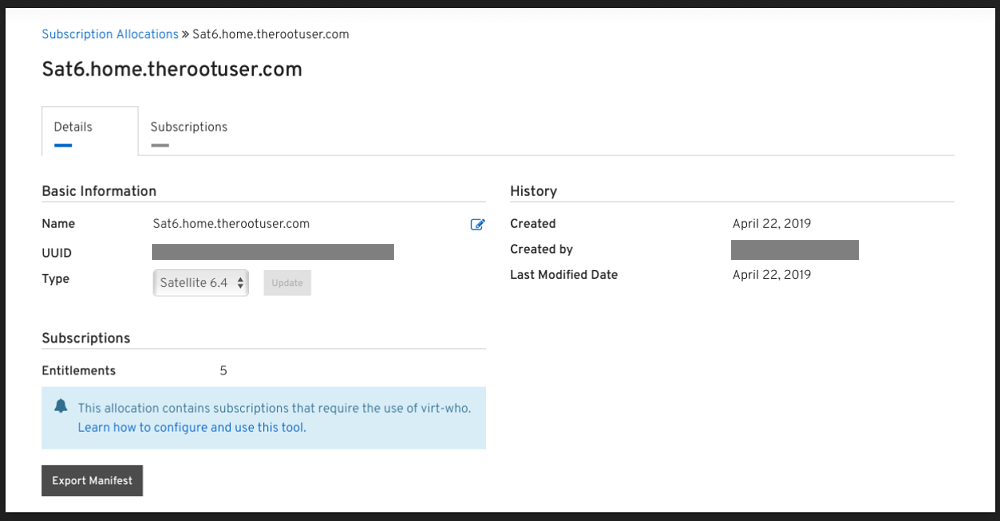
Download the subscriptions from the Red Hat portal.


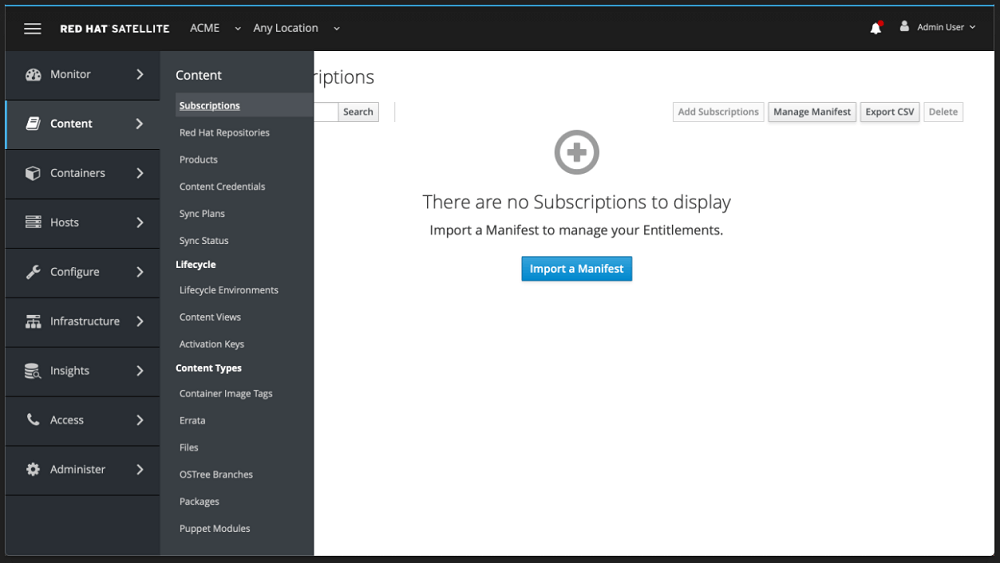
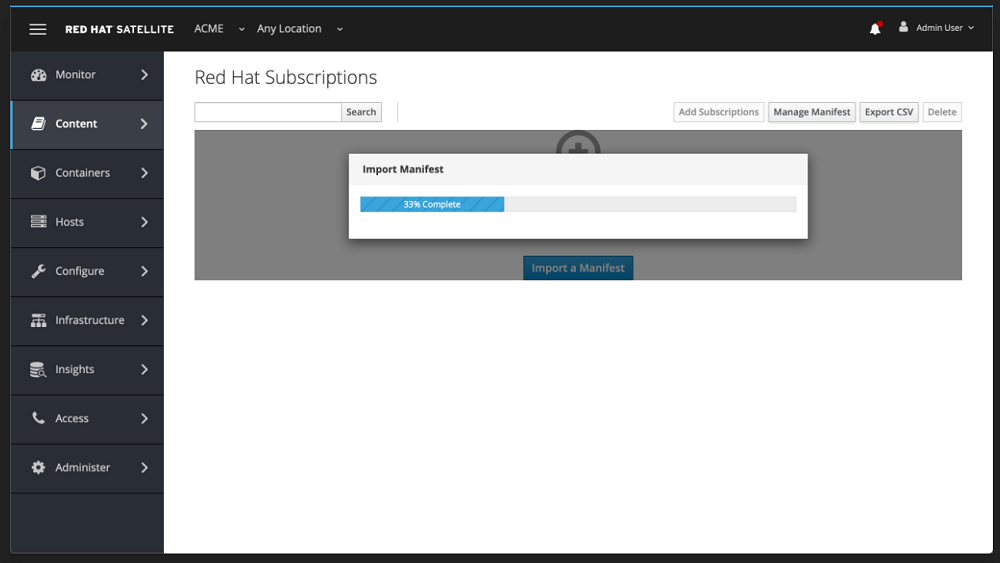
Import the Manifest into Satellite
Open Satellite Server Web Console, Content -> Subscriptions -> Manage Manifest

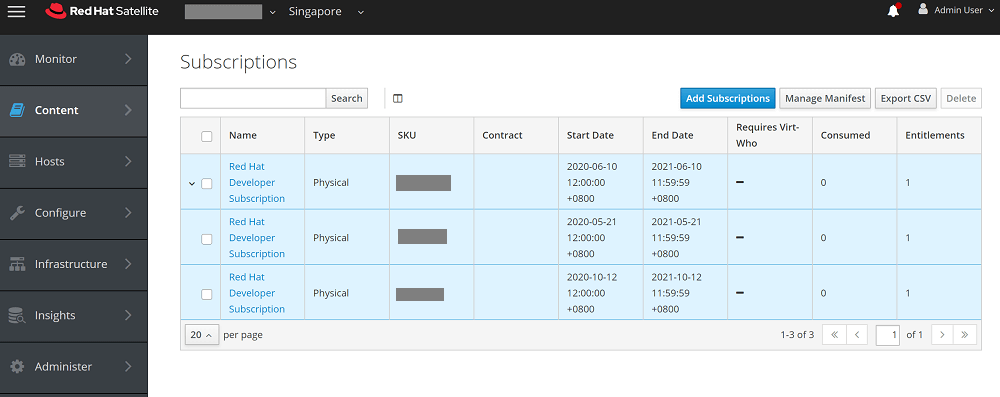
Check List of consumed manifests

Enable the required repos
Content -> RedHat Repositories


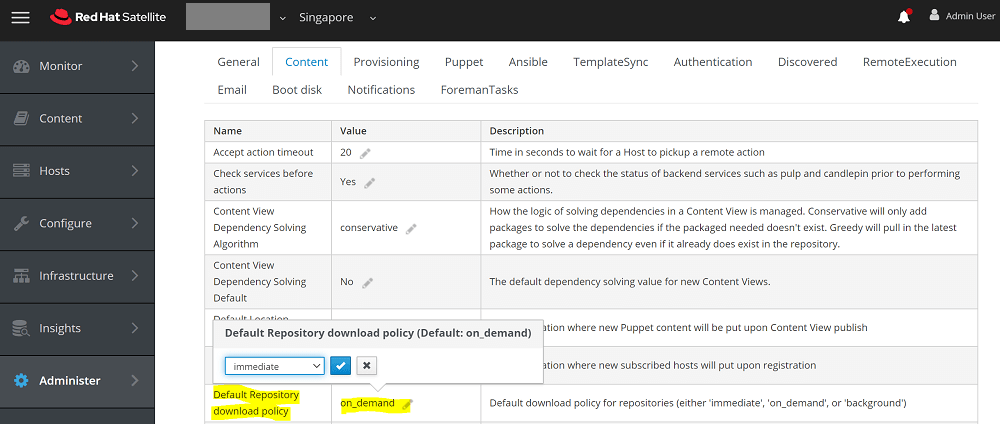
Change the default download policy settings
To change default download policy, follow below steps on Red Hat Satellite WebUI.
Administer > Settings > Content > Select "Default Repository download policy" > set "immediate"
To change download policy of already enabled repository through WebUI.
Content > products > select "Product" > select "repository" > select "Download Policy" > choose the policyTo set download policies for all enabled repositories in Red Hat Satellite 6.
- Changing download policy to 'immediate'.
# foreman-rake katello:change_download_policy DOWNLOAD_POLICY=immediate

- Changing download policy to 'on-demand'.
# foreman-rake katello:change_download_policy DOWNLOAD_POLICY=on_demand
Refer How to change download policy of repositories in Red Hat Satellite 6 ? for more details.
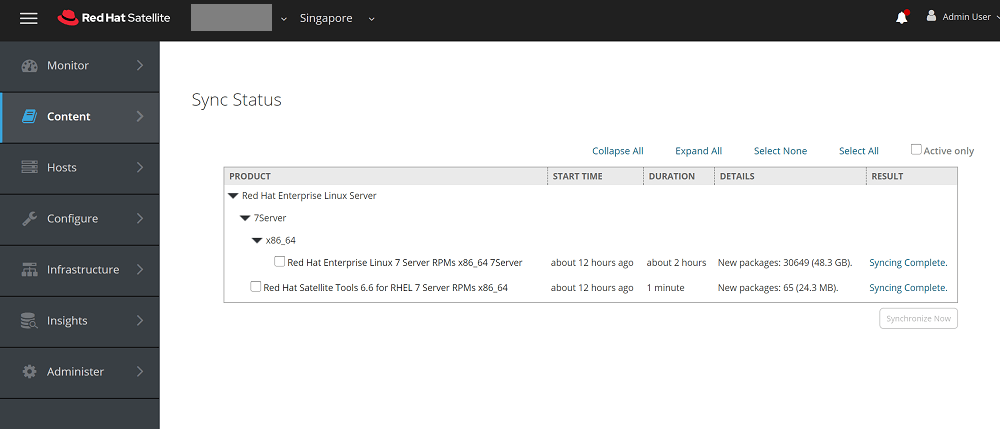
Synchronize the Repo
Make sure all the repos enabled are synced without any errors. Content -> Sync Status

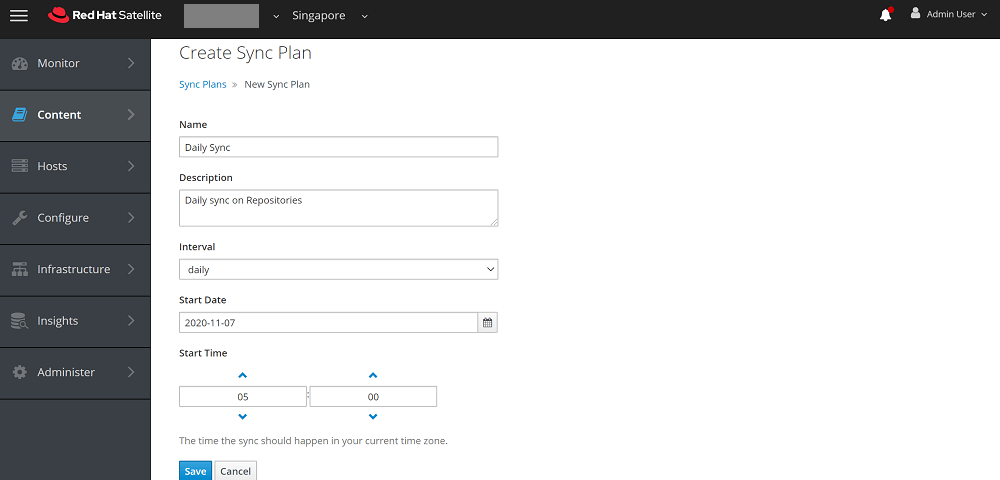
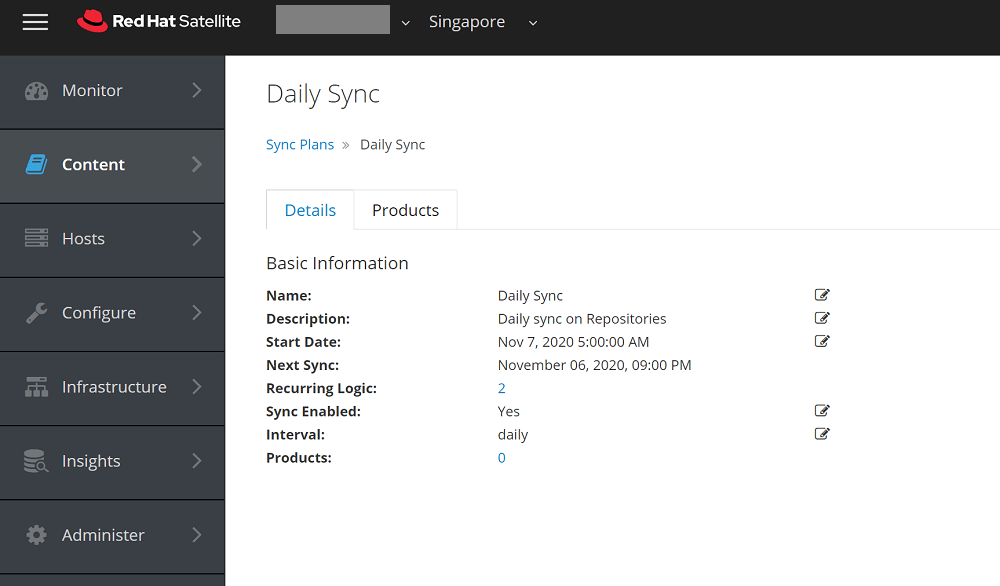
Setting up a daily sync plan if applicable
Content -> Sync Plans > Create Sync Plan


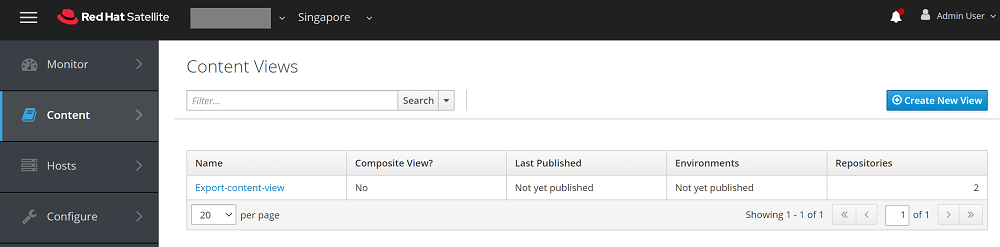
Create Content View
Create a content view and enable the repositories inside content view. Content -> Content Views

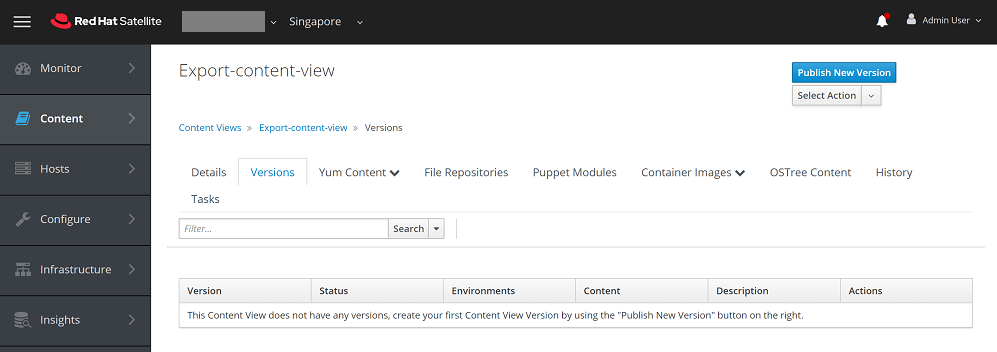
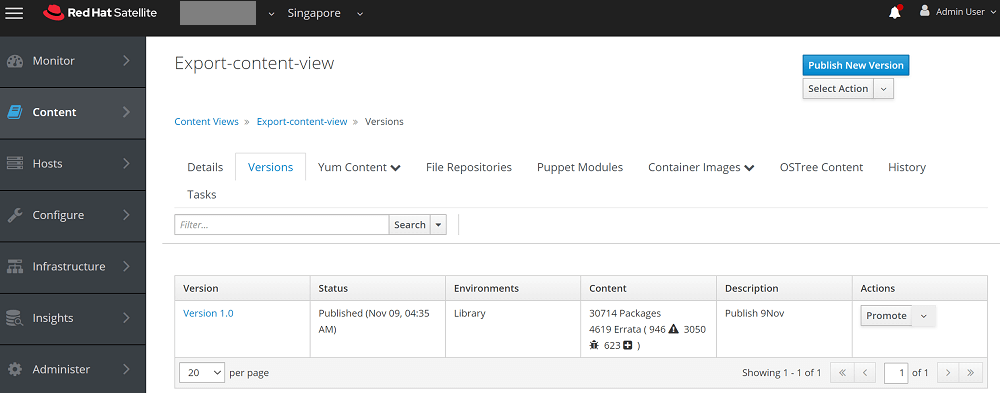
Publish Content View


Export the content version from Command Line
-- List the Organization
# hammer organization list

-- List the content and Export the content published version
# hammer content-view version list
# date && hammer content-view version export-legacy --id 3 && date
Once export completed 100% foreman will automatically generate the folder and place the exported contents.
# ls -ld /var/www/html/pub/export/MYORG-Rhel7-8-v1.0/MYORG/content_views/Rhel7-8/1.0/