

GNS3 (Graphical Network Simulator) is the most popular – open source, free software – tool for designing and simulating network infrastructure.
GNS3 has 2 parts
- The GNS3-all-in-one software (GUI)
- The GNS3 virtual machine (VM)
This post is not meant for explaining GNS3; read GNS3 Documentation for more details. I just want to share the common mistake, which newbies do when setup GNS3. And the simple configuration to resolve the same.
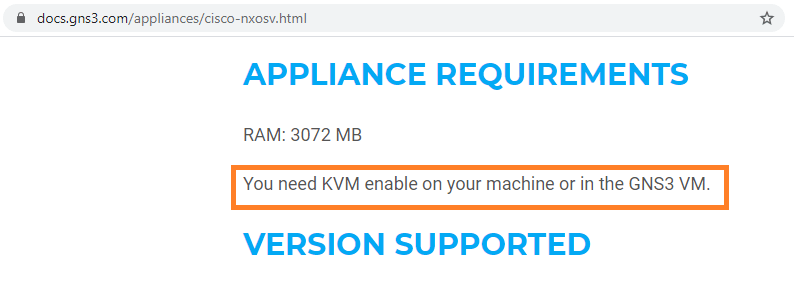
While setting up separate GNS3 VM, you need to enable KVM support for the GNS3 VM (even if you are using all in one). Because, most of the appliance need KVM support on GNS3 VM otherwise you won’t be able to import network appliance to GNS3.

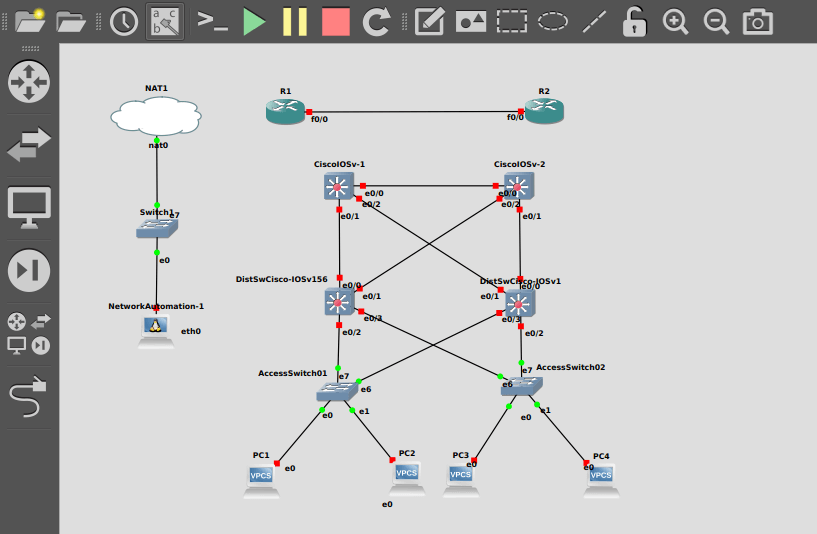
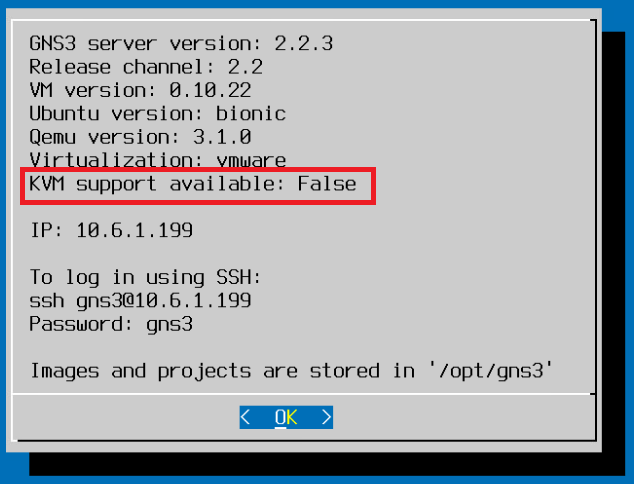
In my case, I am using GNS3 UI on a VM (Ubuntu with Graphics) and GNS3 VM on another VM; both are running on top of ESXi (ver 6.7.0). I have verified that Virtualization has been enabled for my ESXi physical host and tried to import an appliance.

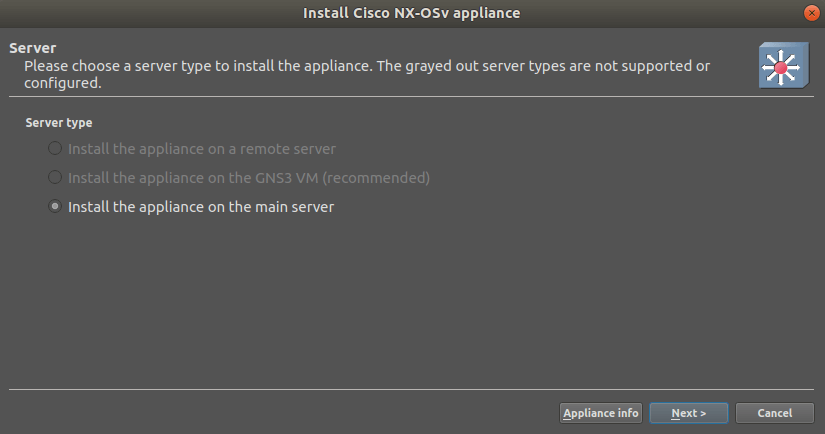
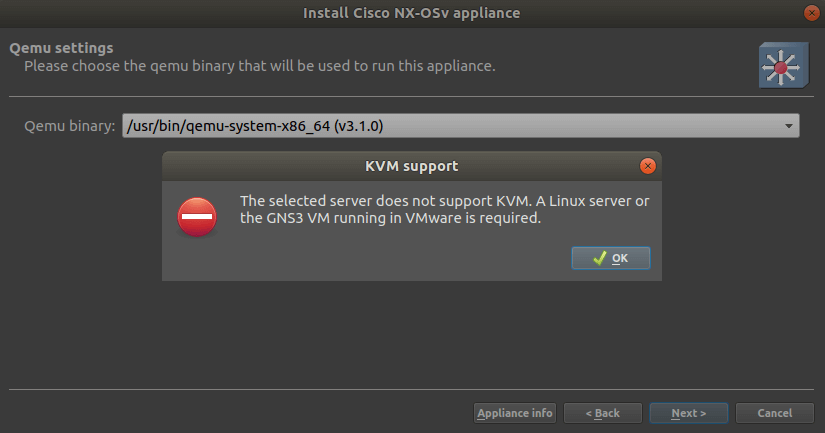
See, both remote server or GNS3 VM no supporting KVM. Still I proceeded with main server; I got error on GNS3 saying, “no KVM support”.

So, I went to GNS3 VM console, yes NO KVM Support !

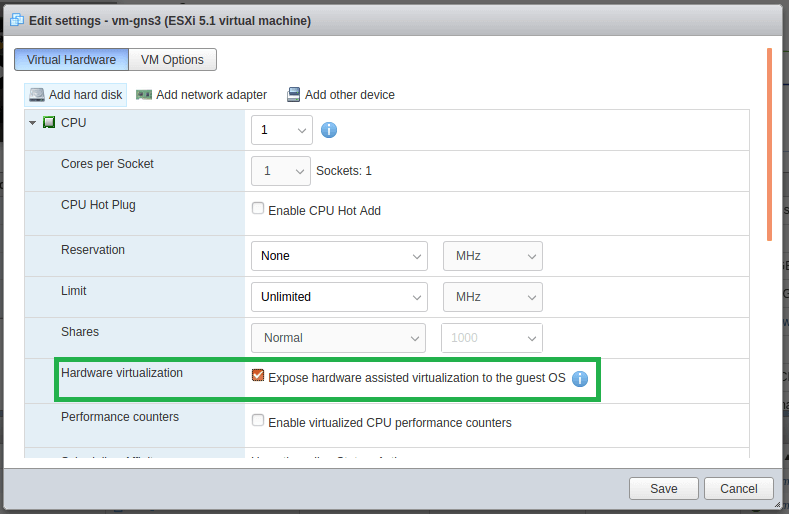
Later I realized that, I missed to enable Virtualization for my GNS3 VM (on ESXi console) and proceeded with same.

Verify the same on GNS3 VM console again.

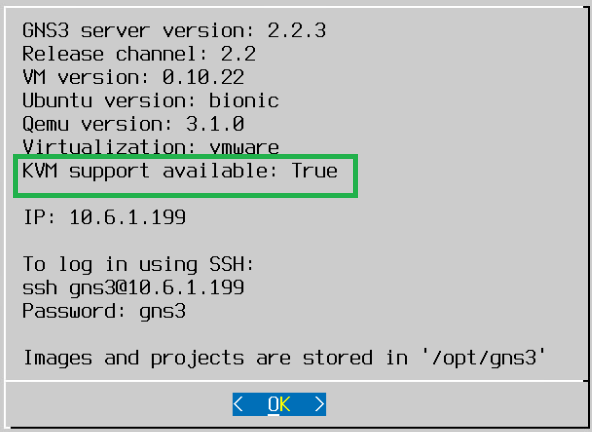
Great, now my GNS3 VM is supporting KVM I can proceed with importing appliance which need KVM support.
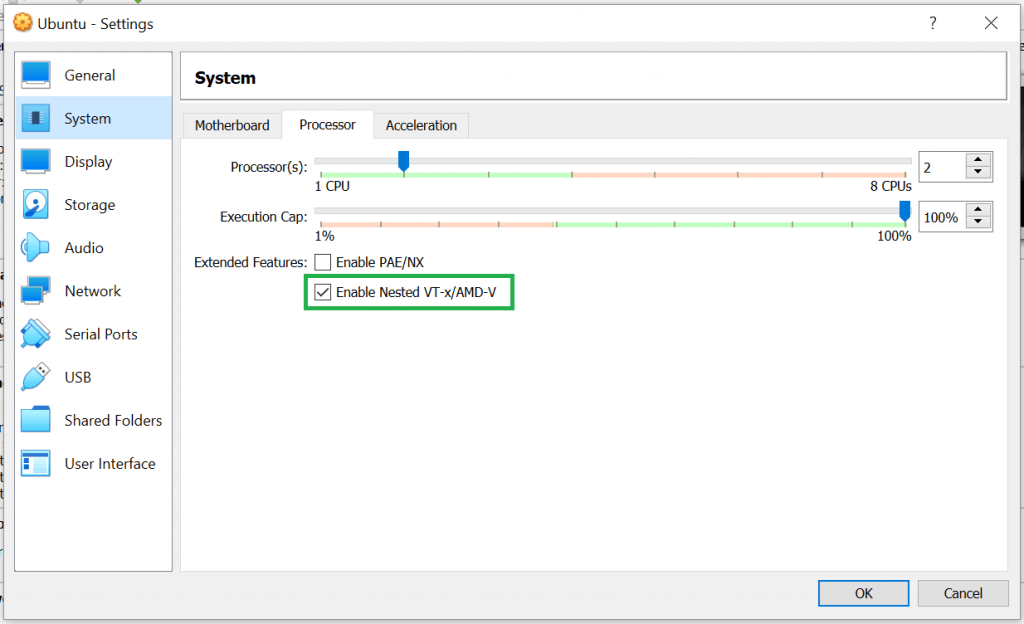
If you are using VirtualBox
Happy news !!! VirtualBox 6.1 is supporting Nested Virtualization and you can use Local GNS3 VM in VirtualBox itself. You can enable Enable Nested VT-x/AMD-V via VirtualBox Manager GUI or using VirtualBox CLI vboxmanage command.
vboxmanage modifyvm Ubuntu --nested-hw-virt on(Where Ubuntu is my vm name)

Enjoy GNS3 !