ComVault Simpana Installation (cv11) on Linux (RHEL7)- Step by Step
-
 Gineesh Madapparambath
- Infrastructre & hardware, Utilities, Comvault
- June 17, 2018
This is a very basic article to share the cv11 installation. If any corrections/mistakes, please feel free to feedback as I am not an expert on this item.
Once you have installation package on server, unzip and find the setup file.
[root@ams-bkp-101 Unix]# ls -lrta
total 160
-rwx------.  1 root root    52 Mar 12 03:16 cvpkgseed
-rwx------.  1 root root    52 Mar 12 03:16 support
-rwx------.  1 root root    10 Mar 20 01:00 pkg.xml.description
-rwx------.  1 root root 80514 Mar 20 01:00 pkg.xml
-rwx------.  1 root root   118 Mar 20 01:00 version
-rwx------.  1 root root   132 Mar 20 01:00 silent_install
-rwx------.  1 root root 47053 Mar 20 01:00 detect
-rwx------.  1 root root   132 Mar 20 01:00 cvpkgadd
drwx------.  4 root root   110 Jun  8 05:38 linux-ppc64
drwx------.  4 root root   113 Jun  8 05:38 linux-ppc64-le
drwx------.  4 root root   109 Jun  8 05:38 linux-s390
drwx------.  4 root root   112 Jun  8 05:38 linux-s390-31
drwx------. 12 root root   279 Jun  8 05:38 linux-x86
drwx------. 12 root root  4096 Jun  8 05:39 linux-x8664
drwx------.  5 root root   120 Jun  8 05:39 sol-sparc
drwx------.  4 root root   111 Jun  8 05:39 sol-sparc-x86
drwx------.  4 root root   105 Jun  8 05:40 sol-x86
drwx------. 12 root root  4096 Jun  8 05:40 .
drwx------.  5 root root   134 Jun  8 05:40 sol-x8664
drwxr-xr-x.  3 root root    39 Jun 11 02:52 ..
Run the installer
[root@ams-bkp-101 Unix]# ./cvpkgadd
Using update installer /root/.gxsetup/cvpkgadd/newinstall:
 - unzipped from /bkp/Unix/linux-x8664/LooseUpdates/Updates/linux-x8664_11.0.0B80-SP10_SP10-HotFix-2166/linux-glibc2.3-x86_64/installer/nwinstall.gz
 - v1180792 15488KB gzipped at XBuildNJ11 on 18-02-09 11:56:57 by pbuilder
Preparing .. READY.
EXTRACT_DIR = /root/.gxsetup/cvpkgadd
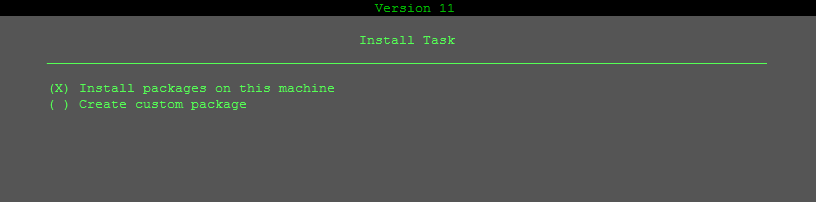
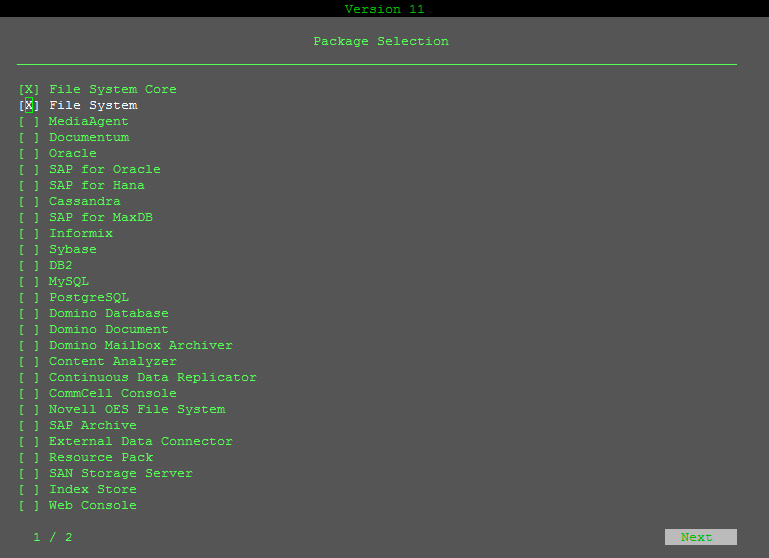
Follow the screenshots as below
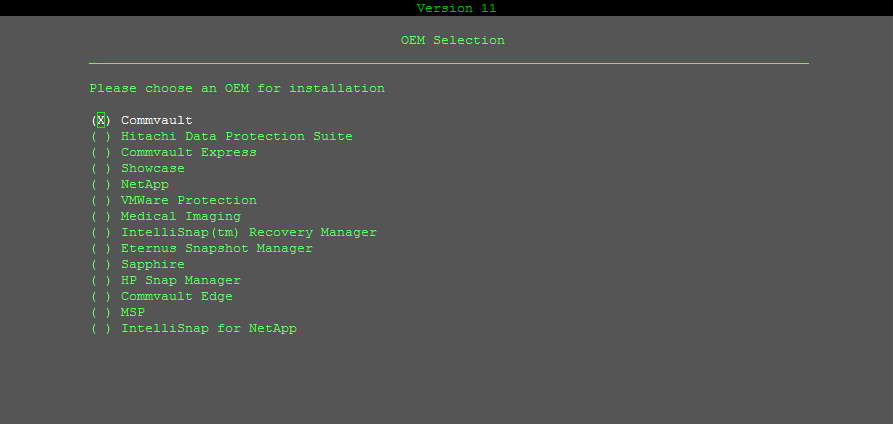
Choose the task
Choose the Items to be Installed
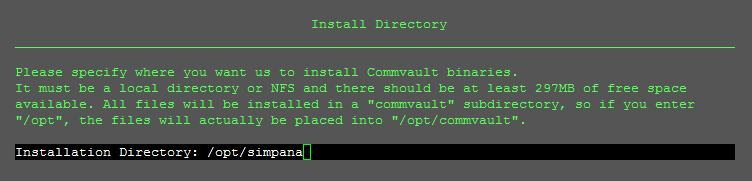
Choose the installation directory
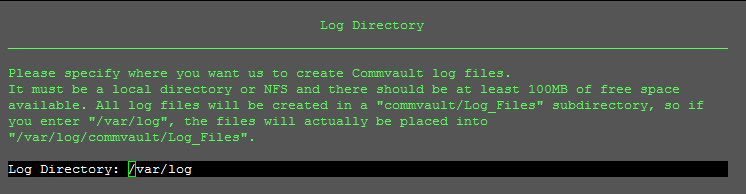
Choose the log directory
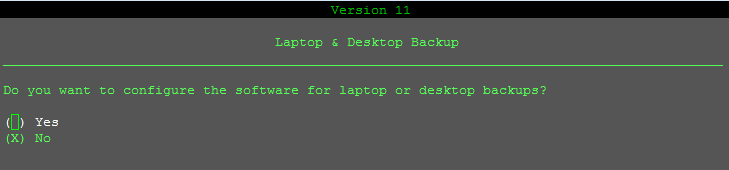
Choose if you want to install software for laptop
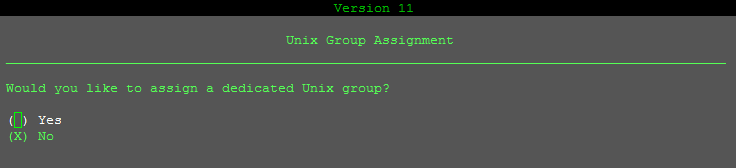
Unix Group Assignment
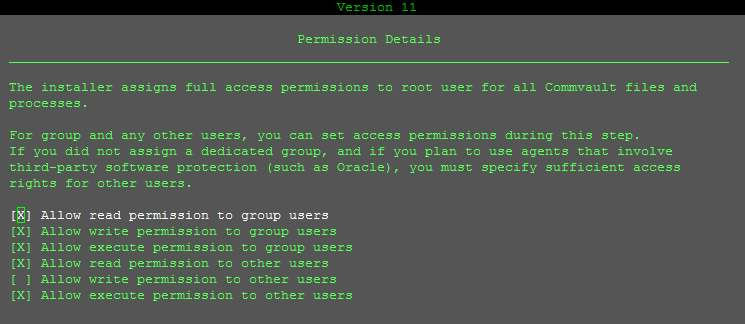
Configure permission
Configure Client Host information

Configure Client information

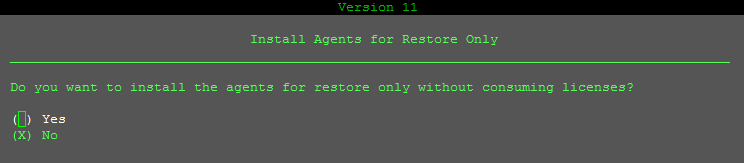
Choose to install Agent for restore
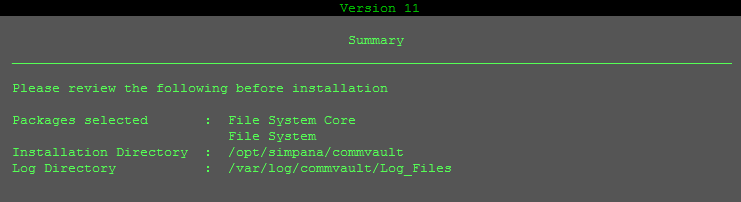
Confirm Summary before proceed with install
Wait for installation to be finished

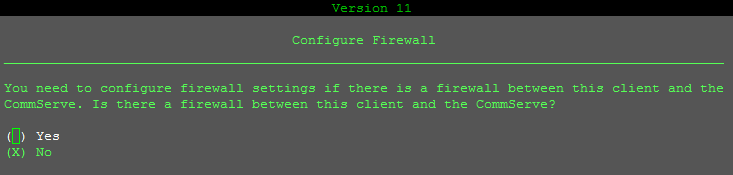
Configure Firewall
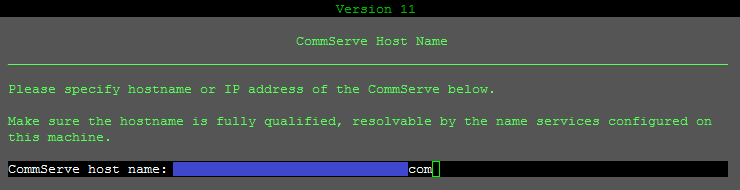
Configure Comserve Hostname
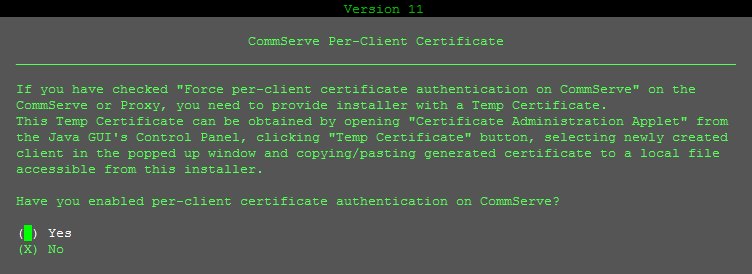
Configure certificate
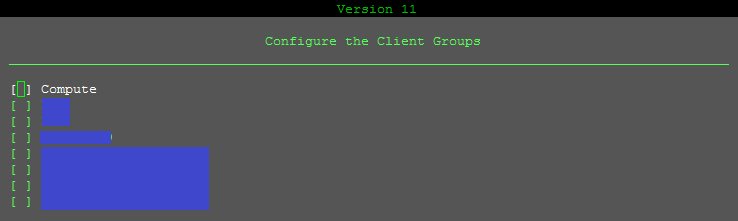
Configure client group
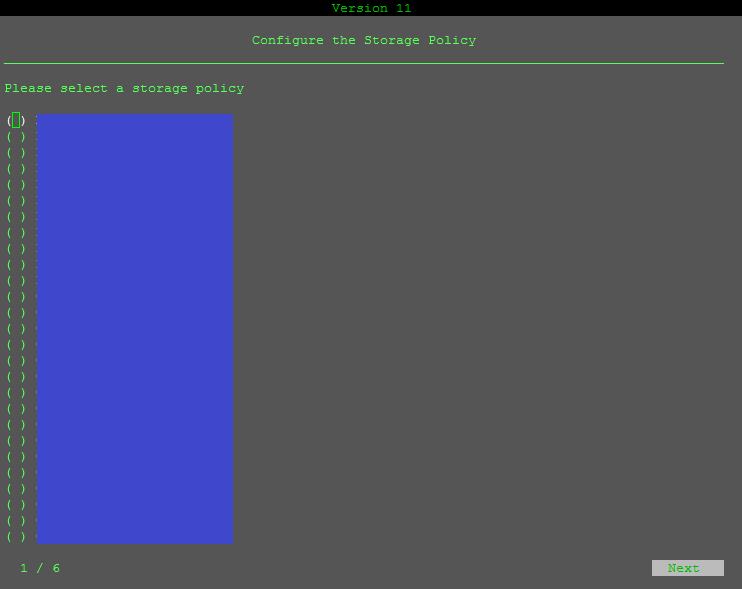
Configure storage policies
Confirmation installation status

That’s all. Once installation done confirm the service status.
[root@ams-bkp-101 Unix]# simpana status
--------------------------------- Instance001 ---------------------------------
[ General ]
 Version = 11(BUILD80) SP10
 CommServe = ams-comserv-102.example.com
 Home Directory = /opt/simpana/commvault/Base
 Log Directory = /var/log/commvault/Log_Files
 Core Directory = /opt/simpana/commvault
 Temp Directory = /opt/simpana/commvault/Base/Temp
 Platform Type = 4
 Cvd Port Number = 8400
[ Package ]
 1002/CVGxBase 11(BUILD80) = File System Core
 1101/CVGxIDA  = File System
[ Physical Machine/Cluster Groups ]
 Display Name = ams-bkp-101
  - Client Hostname = ams-bkp-101.example.com
  - Job Results Directory = /opt/simpana/commvault/iDataAgent/jobResults
Confirm the connection from ComServer.
Gineesh Madapparambath
Gineesh Madapparambath is the founder of techbeatly. He is the co-author of The Kubernetes Bible, Second Edition and the author of Ansible for Real Life Automation. He has worked as a Systems Engineer, Automation Specialist, and content author. His primary focus is on Ansible Automation, Containerisation (OpenShift & Kubernetes), and Infrastructure as Code (Terraform). (Read more: iamgini.com)
Note
Disclaimer: The views expressed and the content shared in all published articles on this website are solely those of the respective authors, and they do not necessarily reflect the views of the author’s employer or the techbeatly platform. We strive to ensure the accuracy and validity of the content published on our website. However, we cannot guarantee the absolute correctness or completeness of the information provided. It is the responsibility of the readers and users of this website to verify the accuracy and appropriateness of any information or opinions expressed within the articles. If you come across any content that you believe to be incorrect or invalid, please contact us immediately so that we can address the issue promptly.