VMware HCX – Installation
-
 Shibin John
- How to, Infrastructre & hardware, Hcx
- January 9, 2020
I had been using several migration tools. However VMware HCX ( Hybrid Cloud Extension ) has some unique feature that allows end user to easy-to-use, easy-to-migrate. Migration can be from on-premise to on-premise from a lower version ( 5.1 and above ) to higher version of vCenter / ESXi hosts or to a VMware on Public Cloud.
Benefits
Before we look into the installation, let’s have look on the benefits side.
- Migration from any type of hypervisor to VMware is possible. If source as a VMware old version of hypervisor, most of the migration can be done as agent-less.
- Data sync can be triggered any time and cut-over can be scheduled.
- Using Bulk Migration method, cut-over window is from 3min to 5min. depends on the data / VM size.
- Unsupported VMs can be migrated using cold migration method.
- Bandwidth can be controlled up to 1Gbps.
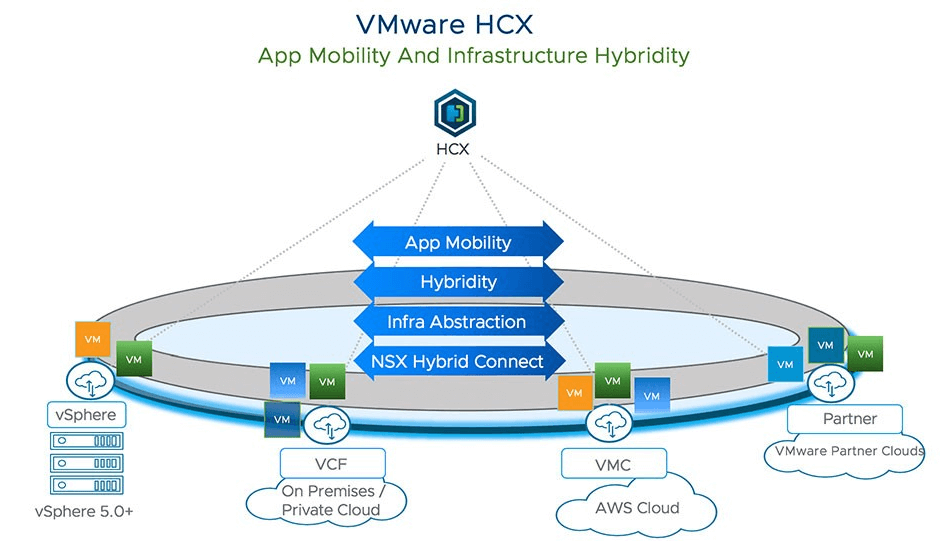
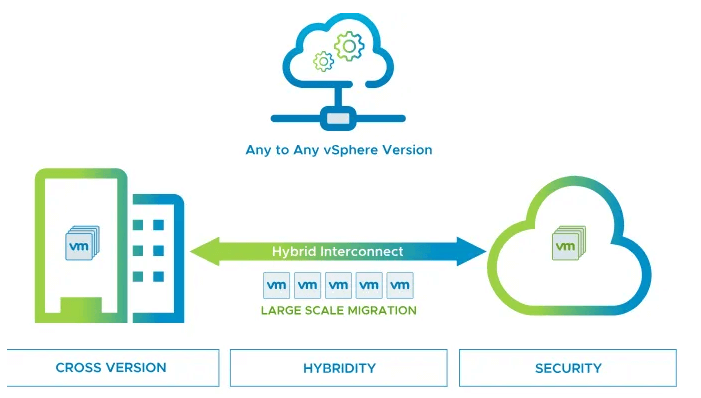
HCX Overview
VMware Hybrid Cloud Extension is a SaaS offering that provides application mobility and infrastructure hybridity across different vSphere versions, on-premises and in the cloud.
Following are the features that HCX offers:
1: vMotion
There are 3 types of vMotion it offers. Live vMotion, where it moves the VM from source site to target without disruption. This is a zero-downtime migration technic.
Cold Migration is another type of vMotion, where it moves powered off VM’s from source to target.
Replication Assisted vMotion ( RAV ) is another type, where we can initiate the data replication early and can schedule a vMotion window for the migration.
2: Bulk Migration
This is another feature that can trigger data transfer early and can schedule a cutover window. In this case, a copy of source VM will be retained at source and the VM will be gracefully shutdown and migrate to target and power up.
3: OS Assisted Migration
Above given technics are agent less migration methods. OS Assisted Migration is agent-based migration method, where we need to install Sentinel software on the Linux / Windows OS which need to migrate. Switchover can be scheduled or immediate after the replication completed.
Installation – Basic Info
You must procure the license for the product and must have valid access to MY Vmware portal. Once the license reflected to your account, you should be able to download the VMware HCX OVF template.
In HCX, source HCX Manager is known as HCX Enterprise Manager and target HCX Manager is known as HCX Cloud . Downloaded OVF has to be installed in target site first. HCX Enterprise Manager OVF file is then downloaded from the target HCX appliance ( explain in later section ).
You must have admin rights in each vCenter for deploying and managing appliances.
You need to take note of proxy IP and user info, if any, as that requires during the configuration.
HCX OVF Deployment
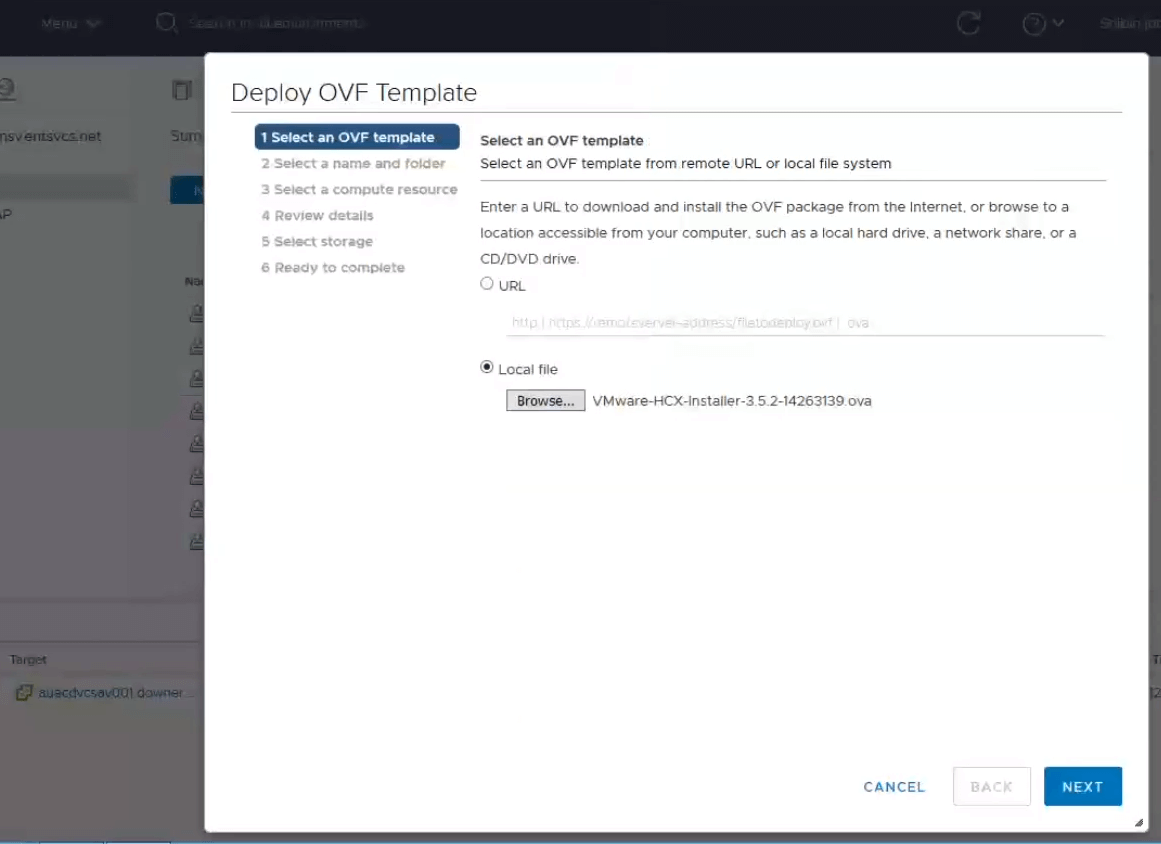
Remember to set password for both admin and root. This requires to access the appliance via GUI as well as CLI.
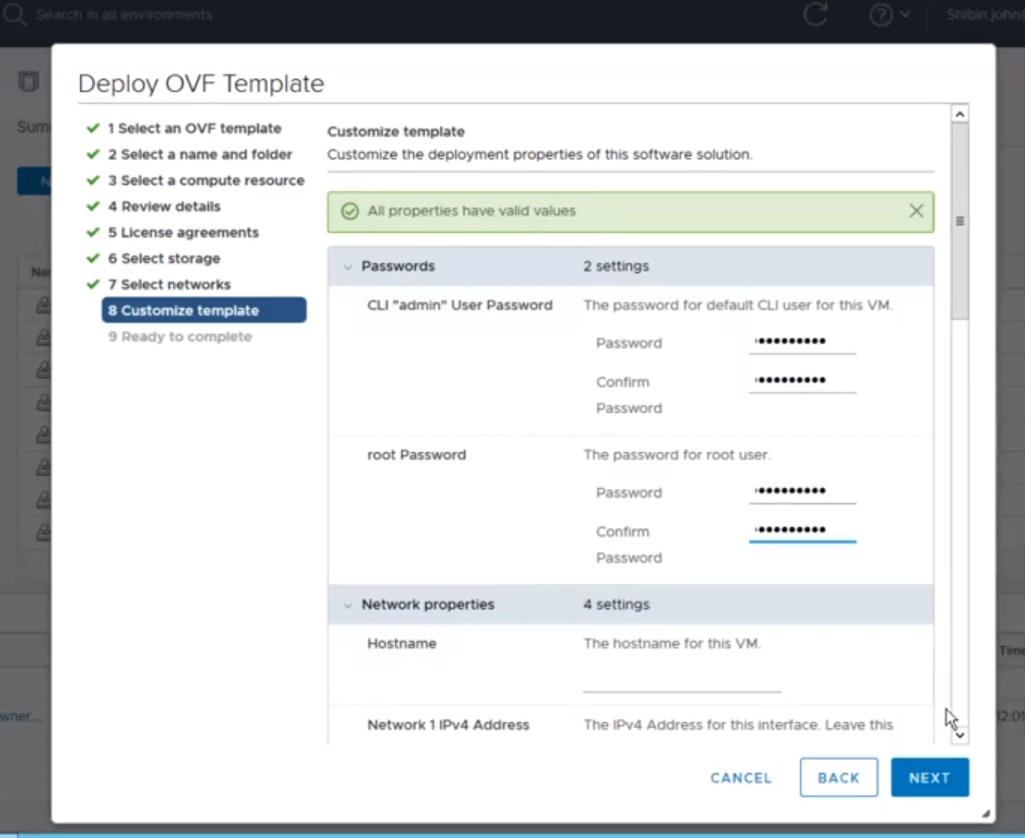
Also need to enable SSH. This will help to perform advanced troubleshooting.
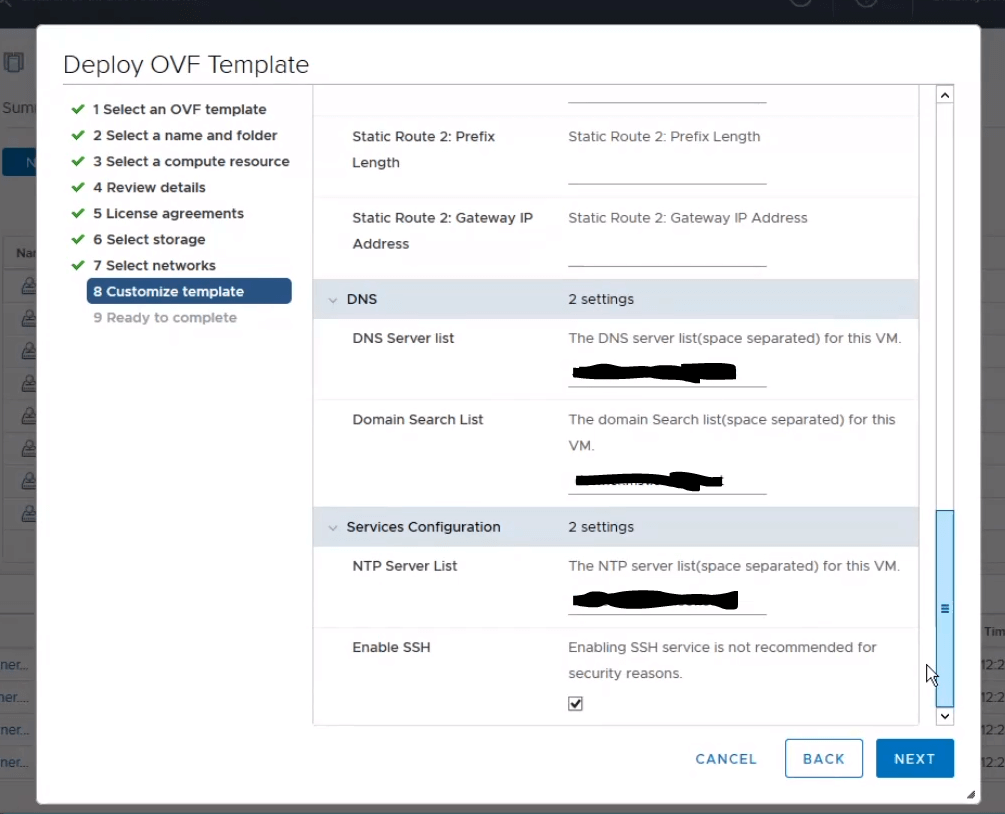
Review the details and click finish to start deploying template. Depends on your network speed, you will be able to finish the deployment in 5 min.
Once deployed, locate the VM and power on. Wait for few minutes to start all services. Connect to the appliance GUI via https://<IP of FQDN>:443 . This will take you to the admin console.
If you are doing ssh to the appliance via putty, login as admin user first. Then run su - to become root user.
Configuring HCX
Connect to the appliance GUI via https://<IP of FQDN>:443 . This is the admin console where you will require to login via admin user and the password you set at the time of deployment.
You should have license key in order to activate the appliance and must have valid internet connection either via proxy or direct access. If you are having proxy with authentication, do not use those info at the following section.
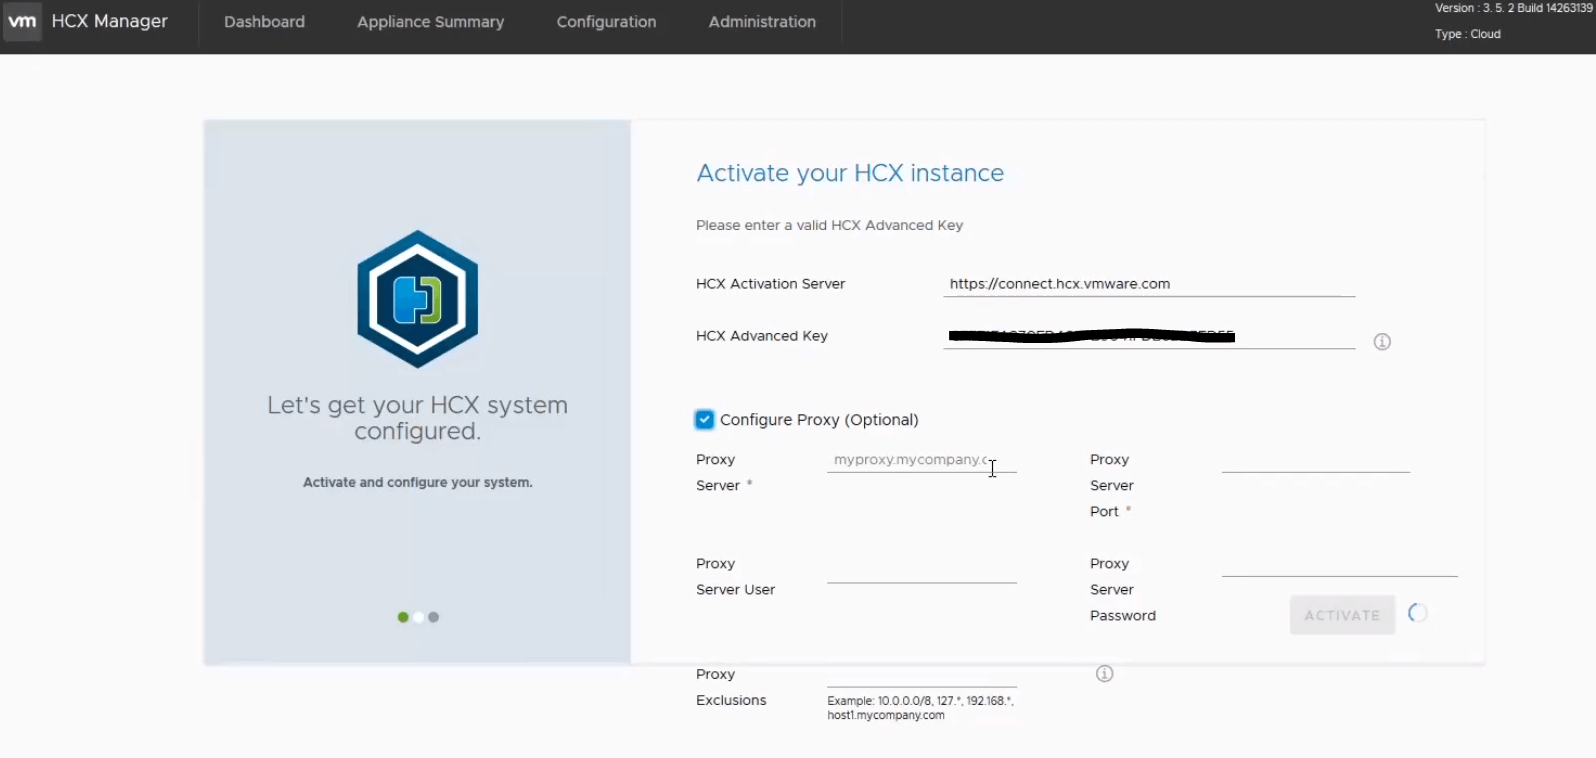
As you can see from above screenshot, it says optional. If your environment uses authenticated proxy, then HCX will not use this option at all. Hence, we need to first permanently configure proxy.
Configuring Proxy
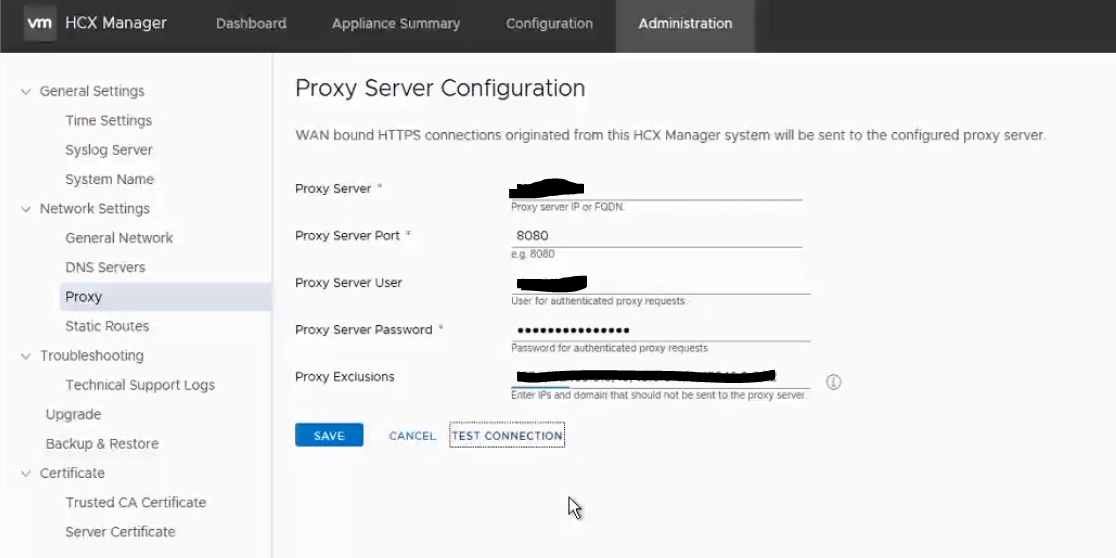
Click Administration in the admin page from top bar, select proxy and click edit.
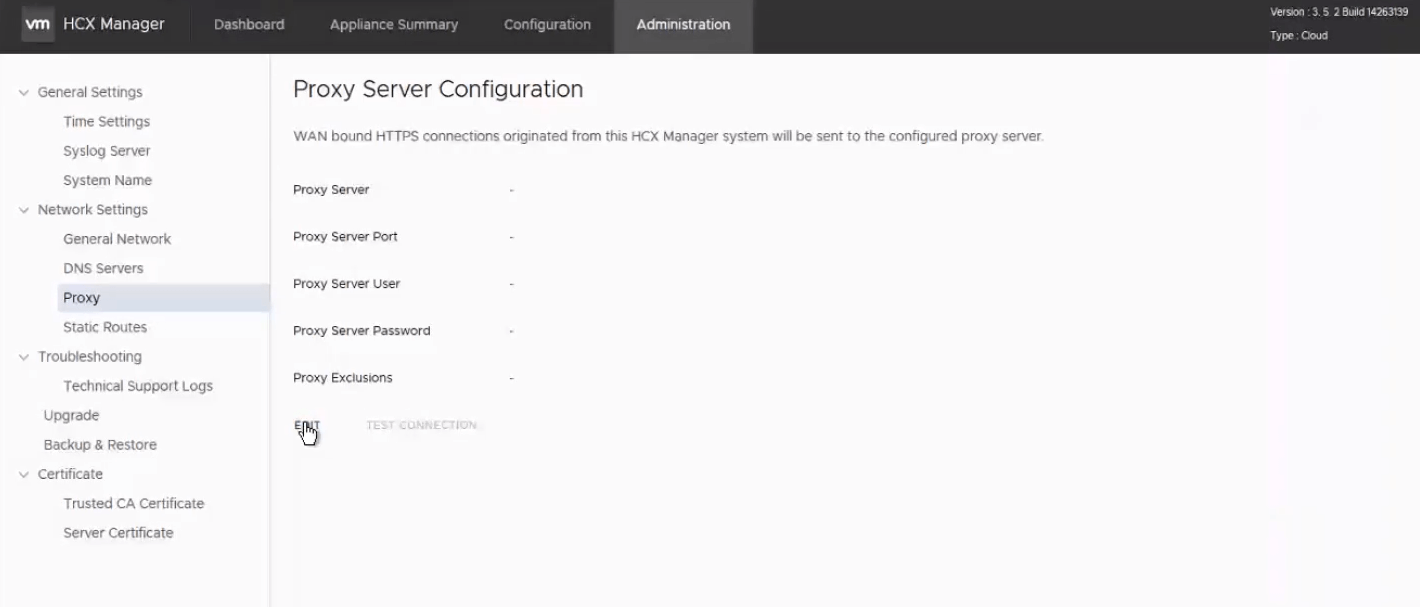
Enter your proxy information. Remember to exclude all local IP’s, vCenter IP’s. Before clicking save, click test connection button.
Enter the test url as https://connect.hcx.vmware.com and click ok.
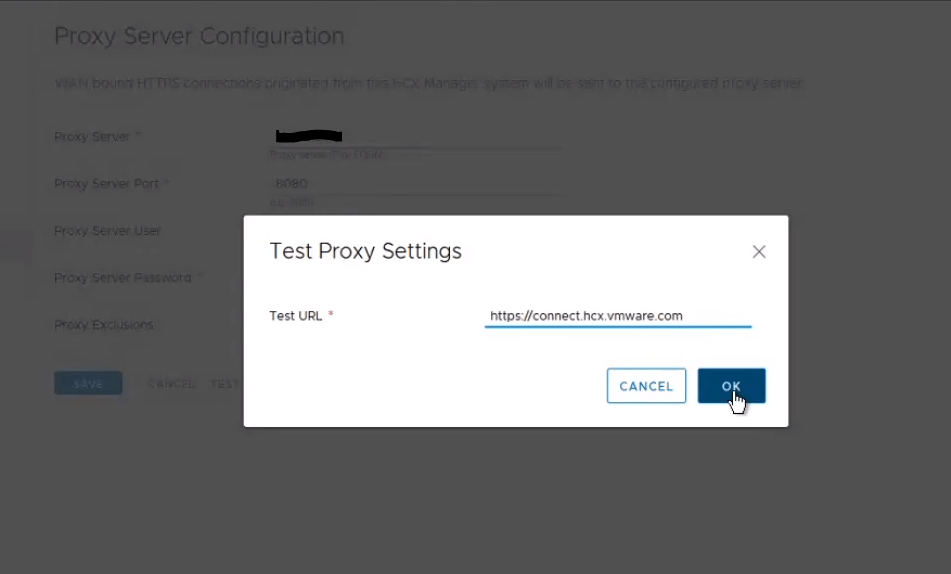
If your proxy working fine, you will see connection successful. Then you can click save button.

Activating HCX
Once proxy set permanently, click configuration from top menu bar, enter the activation key. Remove configure proxy, if selected and then click activate.
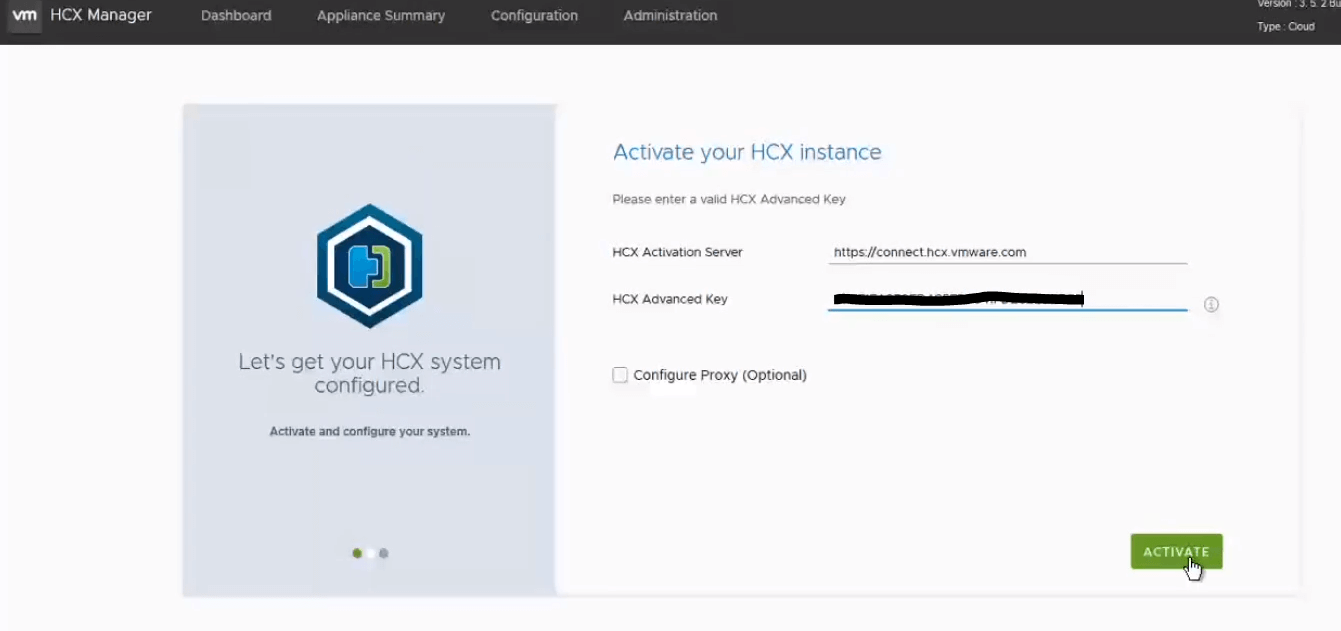
This will establish a connection to VMware cloud, validate license key and then activate it. Once activation successful, it will start updating the appliance from internet. This may take time depends on your internet speed. Once everything done, it will reboot the appliance.
Note : If you ever applied a temporary license key, you will not be able to upgrade the license to permanent. To do so, re-deploy OVF file and start from scratch. This is one limitation, though HCX has an option to upgrade it never works
Configuring HCX Appliance
After the appliance rebooted and services are up, login to admin console again. Login as admin user.
Following information should be handy before you proceed.
- vCenter name / IP with admin credential
- NSX name / IP with admin credentials
- SSO information, if separate PSC uses.
- NTP, DNS info
- AD user groups to add. This is to do vSphere role mapping.
Once you have the info, login to the appliance as admin. It will ask you to select the location first. Next page, you need to enter appliance name. Next, select vSphere as HCX Instance type. Next, enter the vCenter info and NSX info where the appliance located. If any of the information or credential is invalid, it will not proceed.
Next, update the PSC/SSO information. Then configure the public URL, which is the FQDN of HCX / vCenter appliance normally. Then, review the information and restart.
Once the restart completed, login as admin user to admin console, click configuration and select vSphere Role Mapping. Assign System Admin and Enterprise Admin group info by editing the page. This will normally the AD user group that allowed in vCenter and will be allowed to access HCX appliance.
Once configured, login to the appliance via https://<IP or FQDN> and try to login as AD user.
Downloading HCX Enterprise Manager
HCX Enterprise OVF file downloads from HCX cloud manager. To do this, login to the appliance first, go to system updates tab, click Request Download Link.
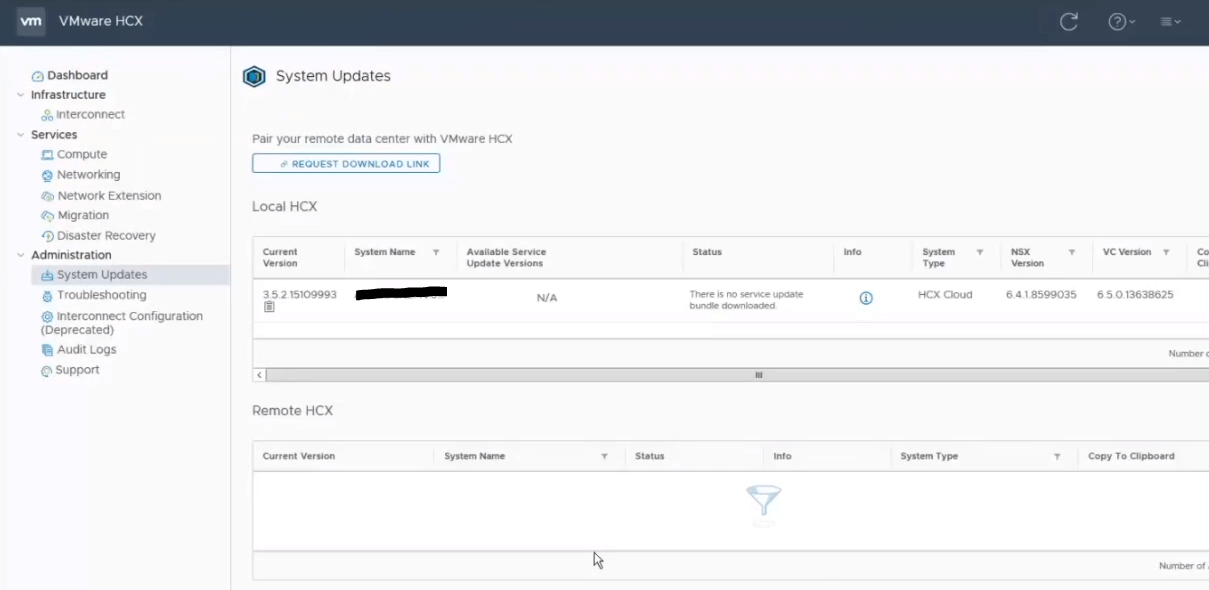
Wait for few minutes. It will generate the OVF file and then will show you download link.
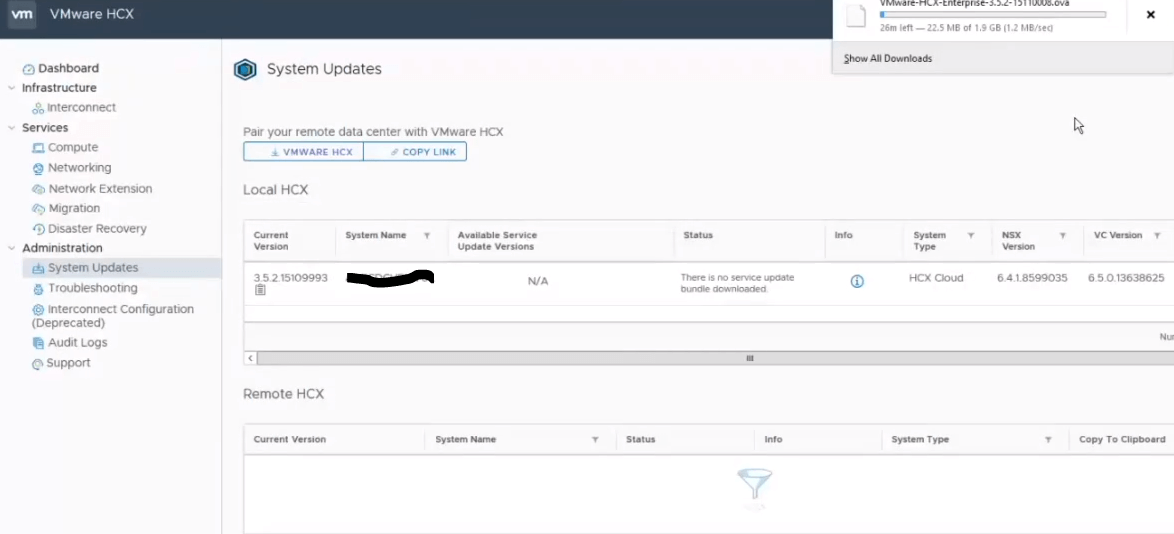
Choose one method from given option to download the file. Transport it to your source site and deploy the template.
Follow similar procedure to install and configure HCX Enterprise Manager.
Other Configurations
Once all basic configuration completed, login to HCX Enterprise Manager, establish site access via site pairing, create network profile, compute profile and activate service mesh. At service mesh creation, you can choose what type of services you need to activate or not.
Detailed explanation of configuring HCX will make this article too long. Make sure once you installed HCX appliance, it must have latest version updated as the latest version fixed several bugs. So it is important to use latest version always.
Also note that this article do not talk about the prerequisites such as firewall rules. Please refer to VMware official documentation for more info.
Shibin John
Project Technical Lead at DXC Technology
Note
Disclaimer: The views expressed and the content shared in all published articles on this website are solely those of the respective authors, and they do not necessarily reflect the views of the author’s employer or the techbeatly platform. We strive to ensure the accuracy and validity of the content published on our website. However, we cannot guarantee the absolute correctness or completeness of the information provided. It is the responsibility of the readers and users of this website to verify the accuracy and appropriateness of any information or opinions expressed within the articles. If you come across any content that you believe to be incorrect or invalid, please contact us immediately so that we can address the issue promptly.