Self hosted runners for GitHub Actions

In this article, I will take you through setting up self hosted runners for GitHub Actions. It is similar to Azure Devops Pipelines Build Agents and this is the space which is evolving after Microsoft acquired GitHub; and so many improvements and developments are going under the hood. Runners are build agents which helps to run your CI/CD pipelines with ease. There are multiple architecture type available for GitHub runners in their repository;I will be installing the pre-release ARM architecture version in my Raspberry Pi device. First step is to download and extract the install binaries on to the device. The easiest way to get it running is by choosing the wizard way associated with the repository; where you wanted the runner to be associated with. Please note that example shown here is for associating a runner with a single GitHub Repository. Below are the steps.
-
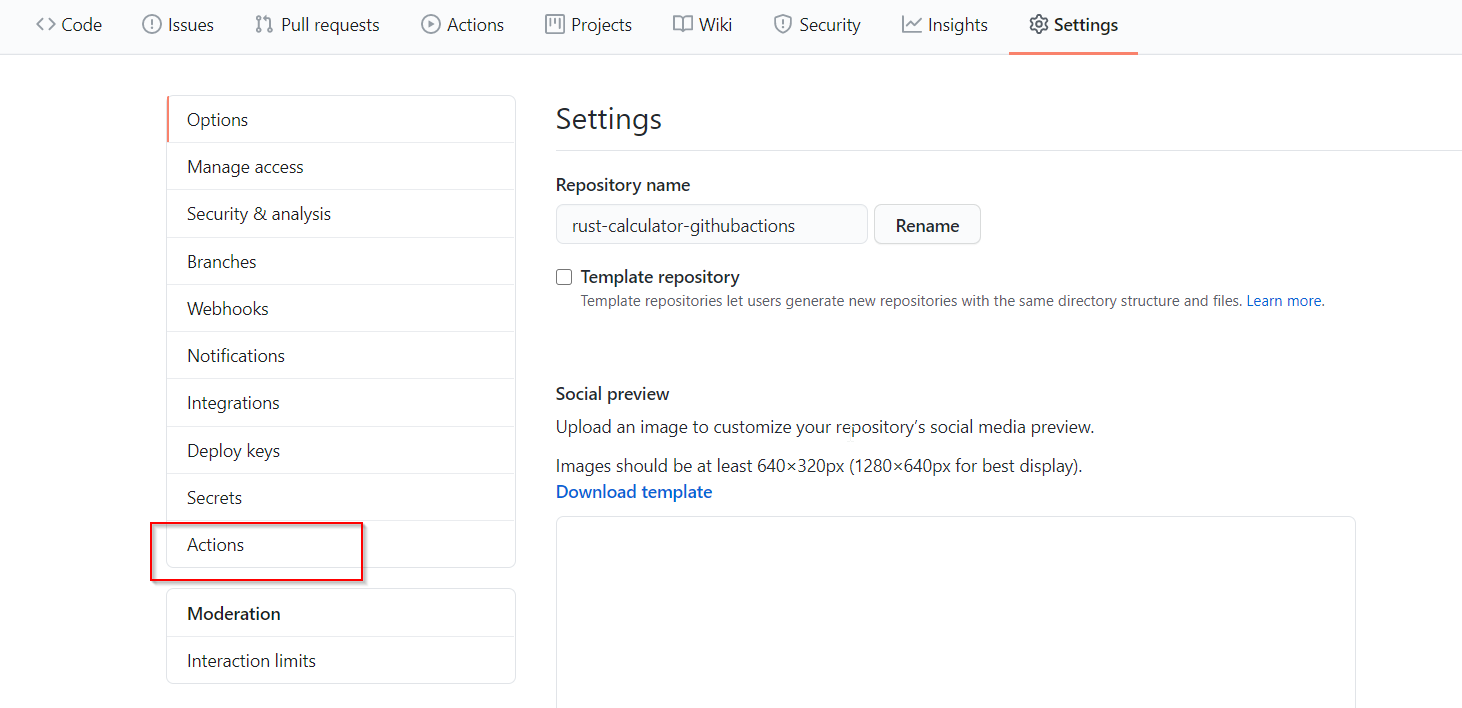
Click on the settings tabs on your GitHub repository

-
Click on the Actions section
-
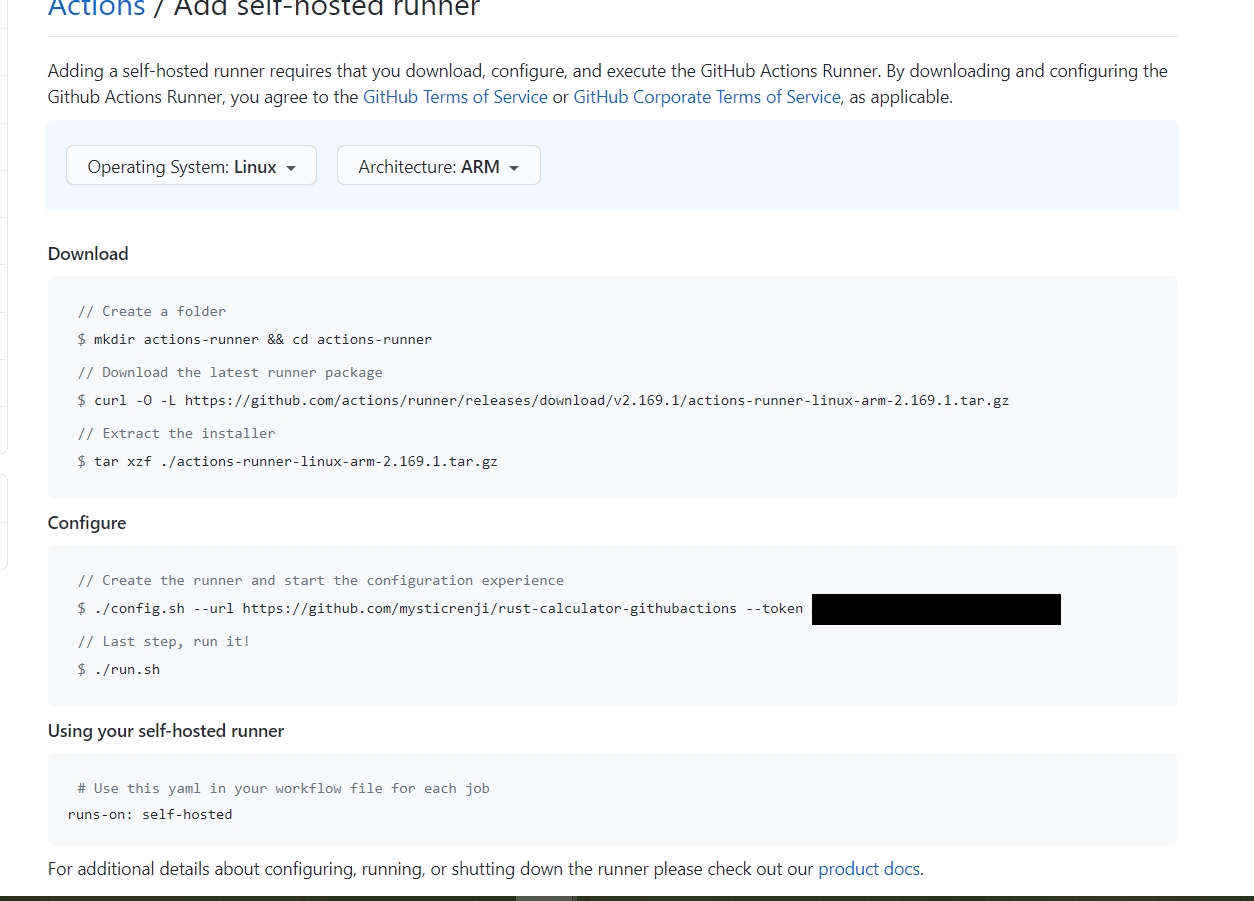
Click on Add runner button

-
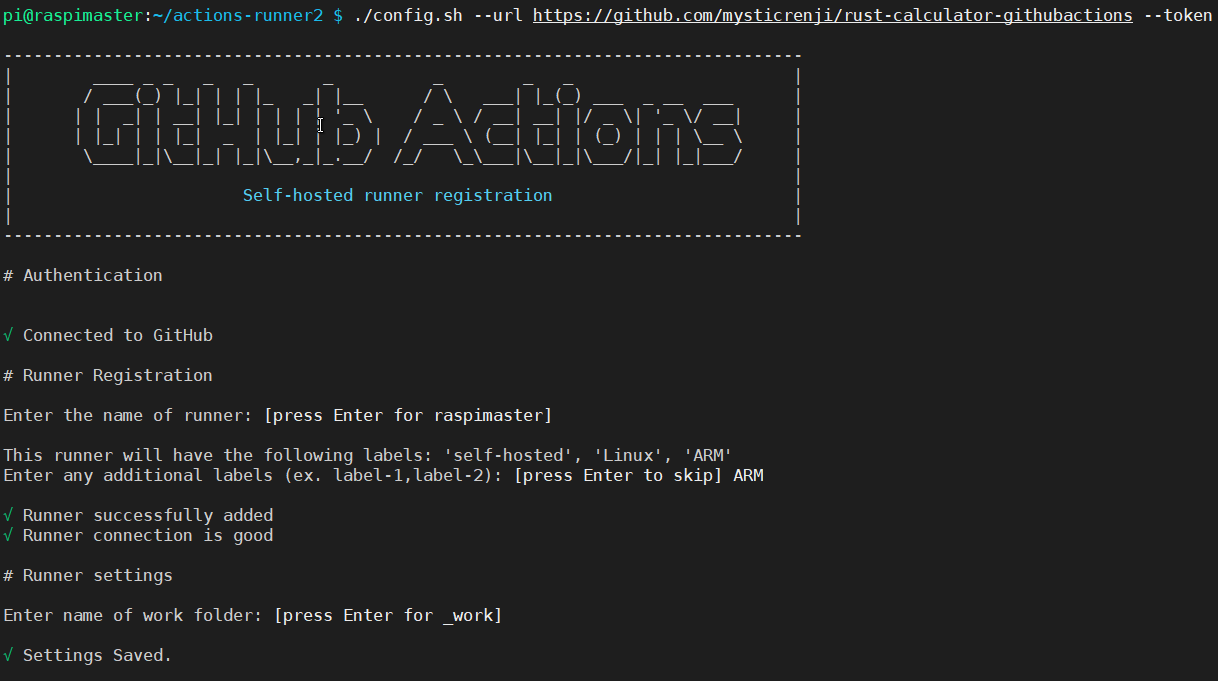
Select the platform and architecture of your choice , and follow the scripts to download and register the runners.
-
While running “config.sh”, please mention your agent name and also a label for the runner. Label is like alias which helps to map from workflow to a particular runner having different capabilities/features.
-
Above displayed script- “run.sh” will execute the runner in interactive mode. This will be helpful when we are setting up for the first time. If you wish to execute it in non interactive mode or like as service, run the “./svc.sh” in your download directory.
| 123 | `sudo ./svc.sh install // For installing the runner as a service``sudo ./svc.sh start // Starting the service``sudo ./svc.sh status // To show the status` |

-
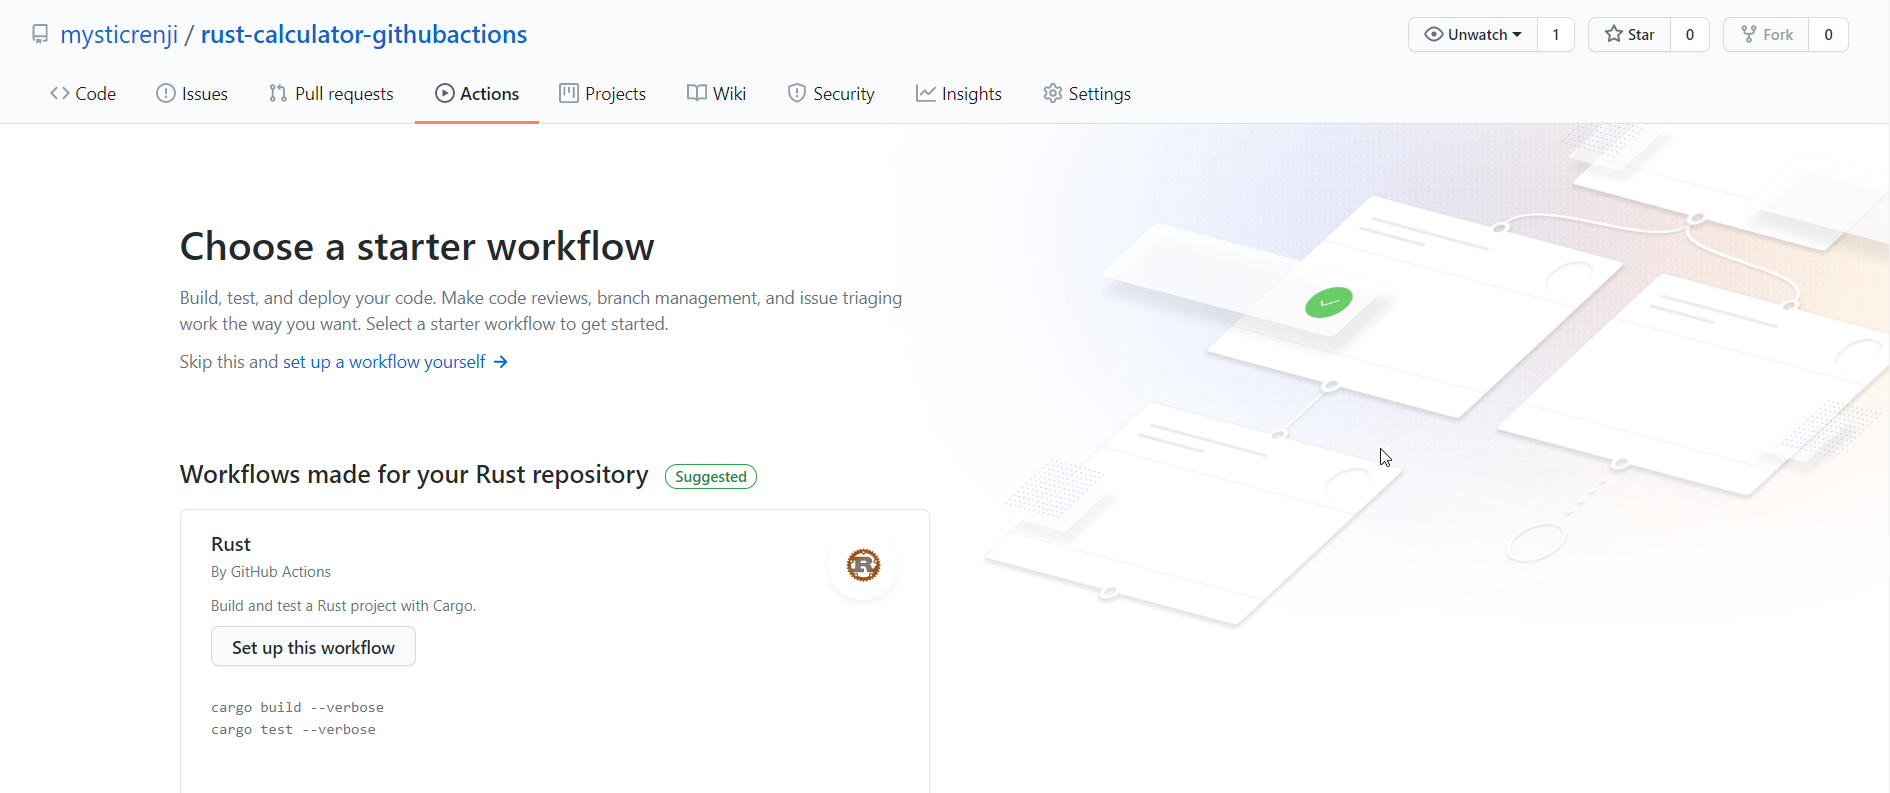
Automatically GitHub would scan your repository and recommend the best workflow template for your project depending up on the language that you used to develop. As you can see the Rust template is automatically selected. I chose the default template.
-
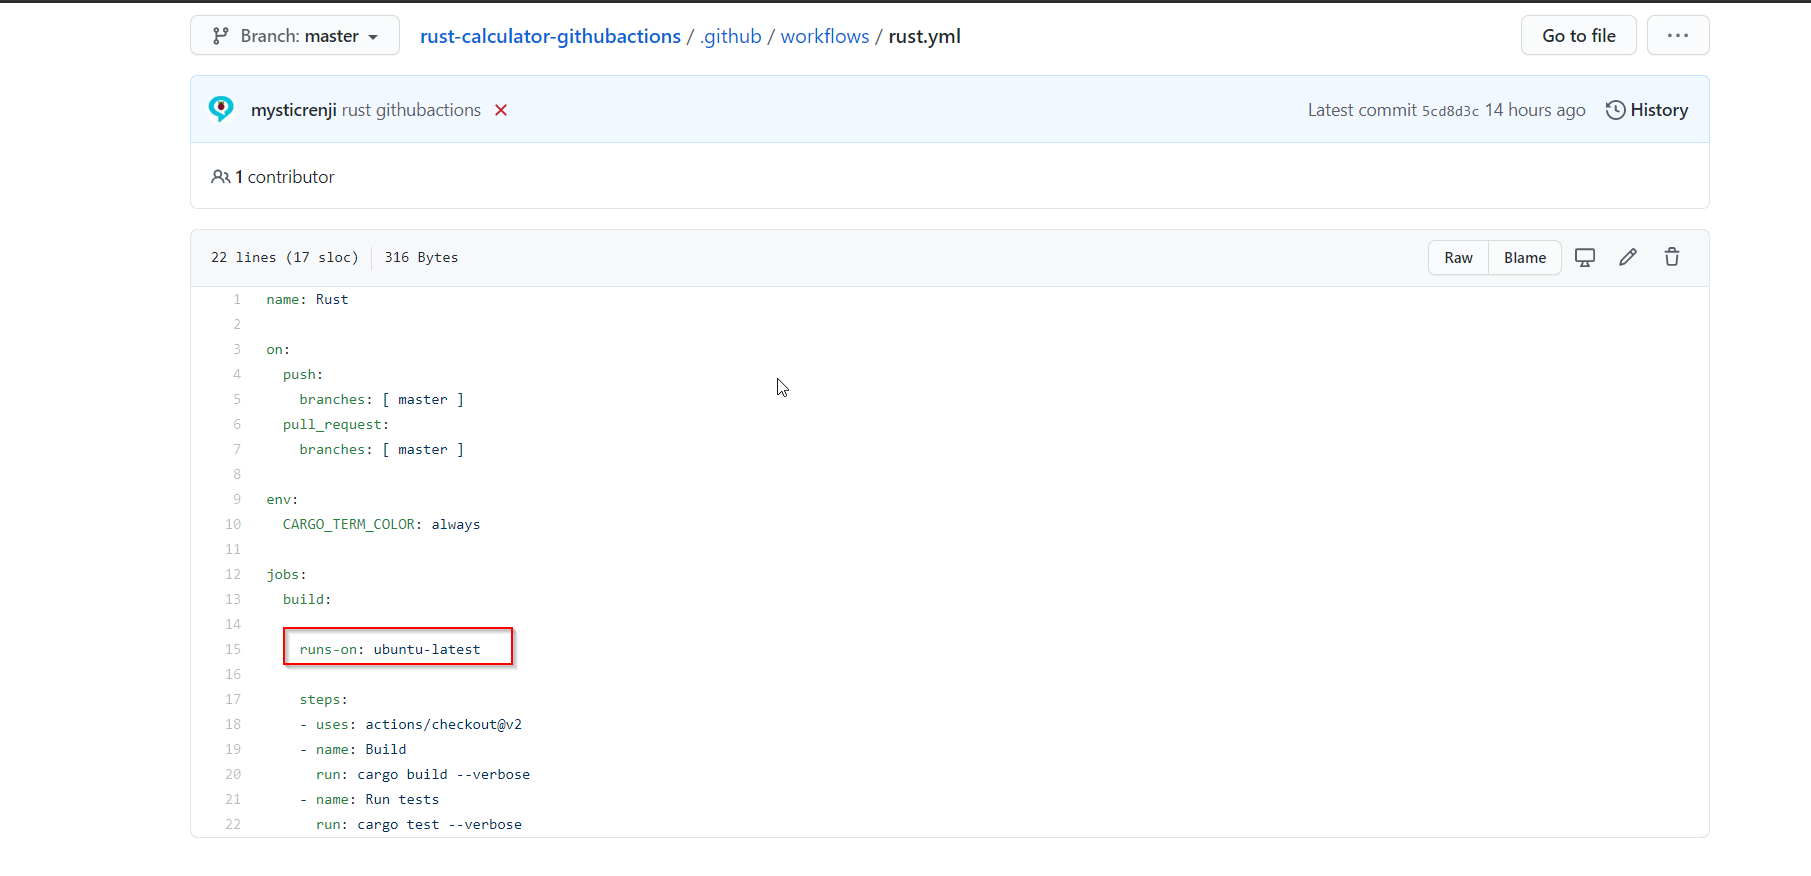
In the Next screen, you can see the yml file displayed for you. You can customize the template according to your needs like modifying the triggers, adding the code coverage steps , pushing the artifacts etc. Do note that you need to change the agent name as marked ( runs-on )to your self hosted agent name otherwise it takes the default one.
-
Just check in some file changes, to see the “GitHub Actions” in Action


That’s all it takes to setup a Self-Hosted GitHub Runner on your machine and build a project tapping the Runner. Github Repo – https://github.com/mysticrenji/rust-calculator-githubactions

Renjith Ravindranathan
A DevOps engineer by profession, dad, traveler and more interestingly to tweak around stuff inside memory constrained devices during spare time.
Note
Disclaimer: The views expressed and the content shared in all published articles on this website are solely those of the respective authors, and they do not necessarily reflect the views of the author’s employer or the platform. We strive to ensure the accuracy and validity of the content published on our website. However, we cannot guarantee the absolute correctness or completeness of the information provided. It is the responsibility of the readers and users of this website to verify the accuracy and appropriateness of any information or opinions expressed within the articles. If you come across any content that you believe to be incorrect or invalid, please contact us immediately so that we can address the issue promptly.