How To Create And Use NAT Network In VirtualBox
-
 Gineesh Madapparambath
- Cloud, Cyber security, Dev ops
- June 18, 2021

Introduction
When we talk about local development or PoC (Proof of Concept) environments, VirtualBox is my first choice as it gives me the choice of multiple options in terms of networking and other features. Recently I noticed that, some of the engineers are creating labs in VirtualBox but they are adding more and more interface for multiple type of connections. There is no harm on that but you can achieve the same result using NAT Network in VirtualBox.
Scenario : Create VM’s in Isolated Network
Here is the scenario: You are doing some labs with multiple Virtual Machines and you need those VM’s to talk each other. But you do not want other machines in the VirtualBox or Virtual Host (your laptop or workstation) or other devices in the network to talk to these VM. Eg: I want to do Penetration Testing on some VM’s and I do not want to interrupt other network on host or in the environment.
By default the VirtualBox will create a network interface for VM with NAT mode by which you can access the outside world (including internet) from the VM. But the with NAT interface will not be able to talk to another VM with NAT interface and not suitable for your case.

So I found people create internal network interface for the VM’s and assign a different IP address to talk each other. This is not really needed if you can configure and use a NAT Network . All the VM’s connected to the NAT Network can talk each other as in the same network. Also these VM’s was talk to outside world (Virtual host, local network and internet)
How to Create a NAT Network
You can create NAT Network from the VirtualBox GUI or by using VBoxManage utility.
Create a NAT Network using VirtualBox GUI
Open VirtualBox Preferences ( File -> Preferences ) and go to Network Tab.
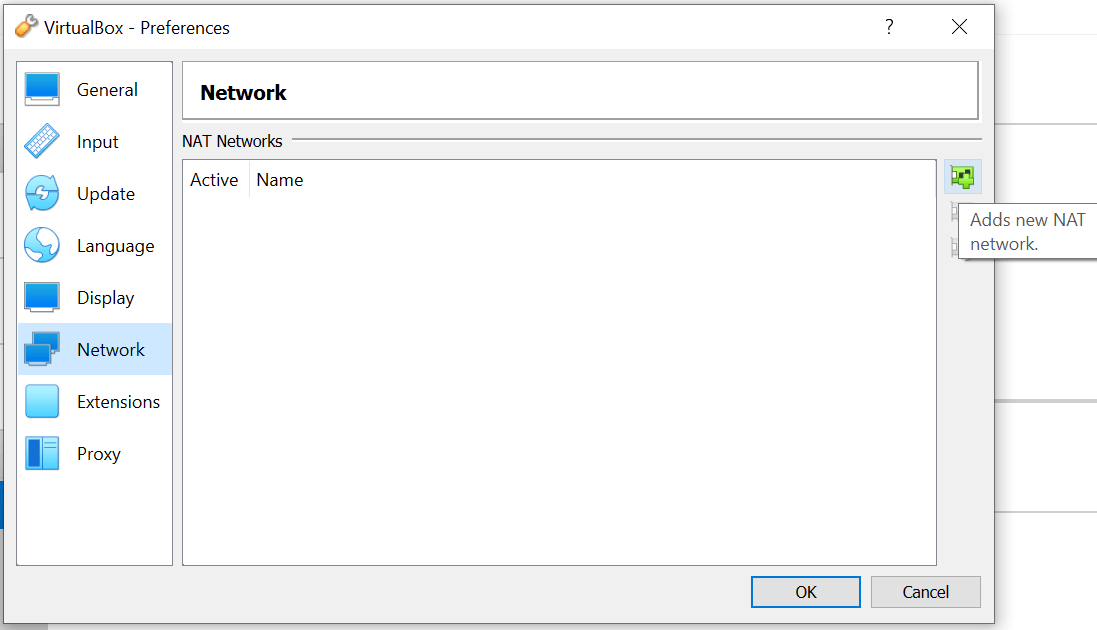
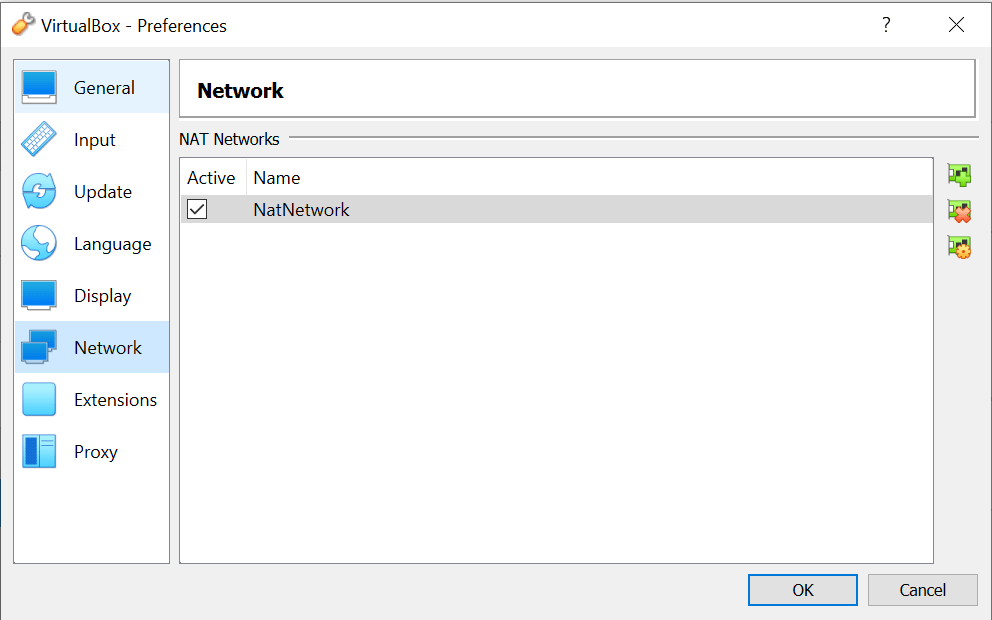
Click on the + icon on right side (Adds new NAT network). It will create a new NAT Network without asking any questions.
You can modify the Network Name, Network CIDR etc by clicking modify button (or double click the NAT Network)
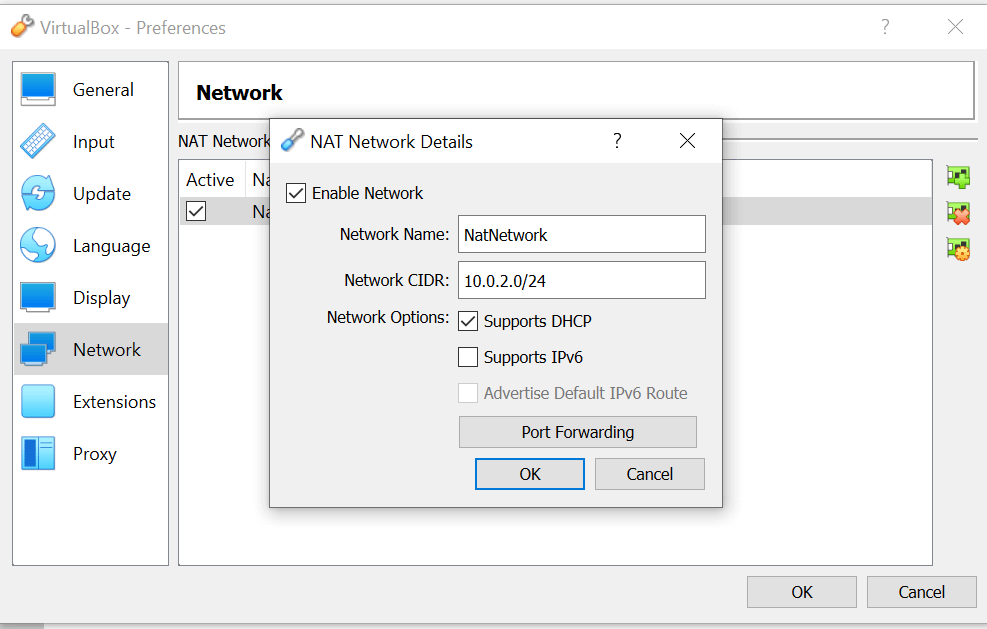
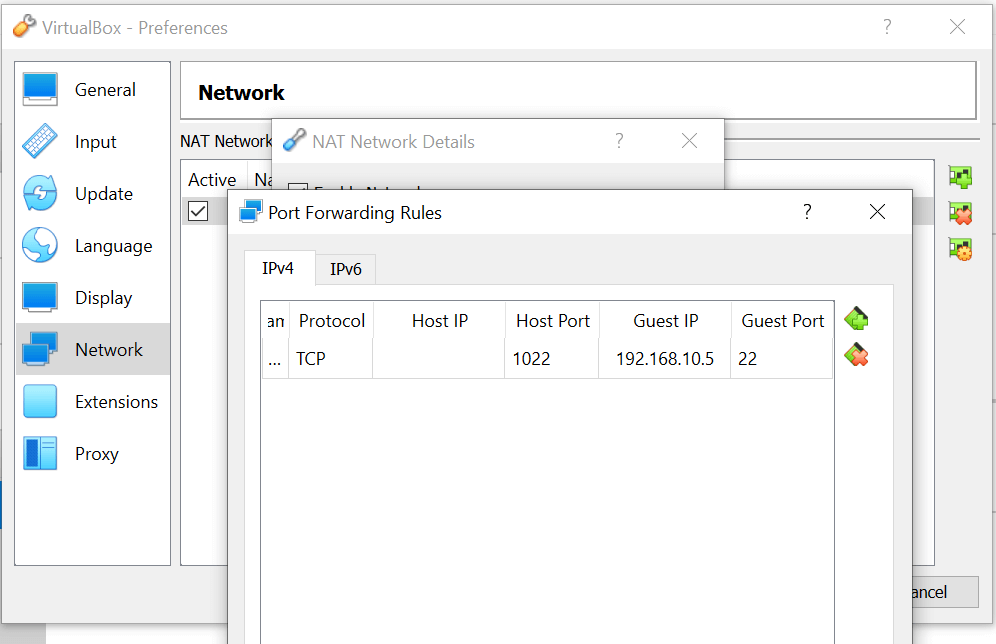
You can also add Port Forwarding for accessing VM (over ssh or http kind of protocols). In below example, we have added a Port Forwarding rule so that the VM IP 192.168.10.5:22 can be accessed via localhost:1022 .
Create a NAT Network using VBoxManage utility
Open a command prompt ( cmd or terminal if you are on Linux/Mac)
## Check existing NAT Networks
$ VBoxManage list natnetworks

## Create a NAT Network
$ VBoxManage natnetwork add --netname NATNetwork101 --network "192.168.10.0/24" --enable

## Check the NAT Network
$ VBoxManage list natnetworks
NetworkName:    NATNetwork101
IP:             192.168.10.1
Network:        192.168.10.0/24
IPv6 Enabled:   No
IPv6 Prefix:    fd17:625c:f037:2::/64
DHCP Enabled:   Yes
Enabled:        Yes
loopback mappings (ipv4)
        127.0.0.1=2

## Enable or Disable DHCP for the network (on or off)
$ VBoxManage natnetwork modify --netname NATNetwork101 --dhcp on

## Start the NAT service
$ VBoxManage natnetwork start --netname NATNetwork101

## Enable Port Forwarding to connect to the VMs
## Forward localhost port 1022 to 192.168.10.5:22 (eg: SSH)
$ VBoxManage natnetwork modify --netname NATNetwork101 \
  --port-forward-4 "ssh:tcp:[]:1022:[192.168.10.5]:22"

## If you need to remove the NAT Network
$ VBoxManage natnetwork remove --netname NATNetwork101
Use NAT Network for Virtual Machines
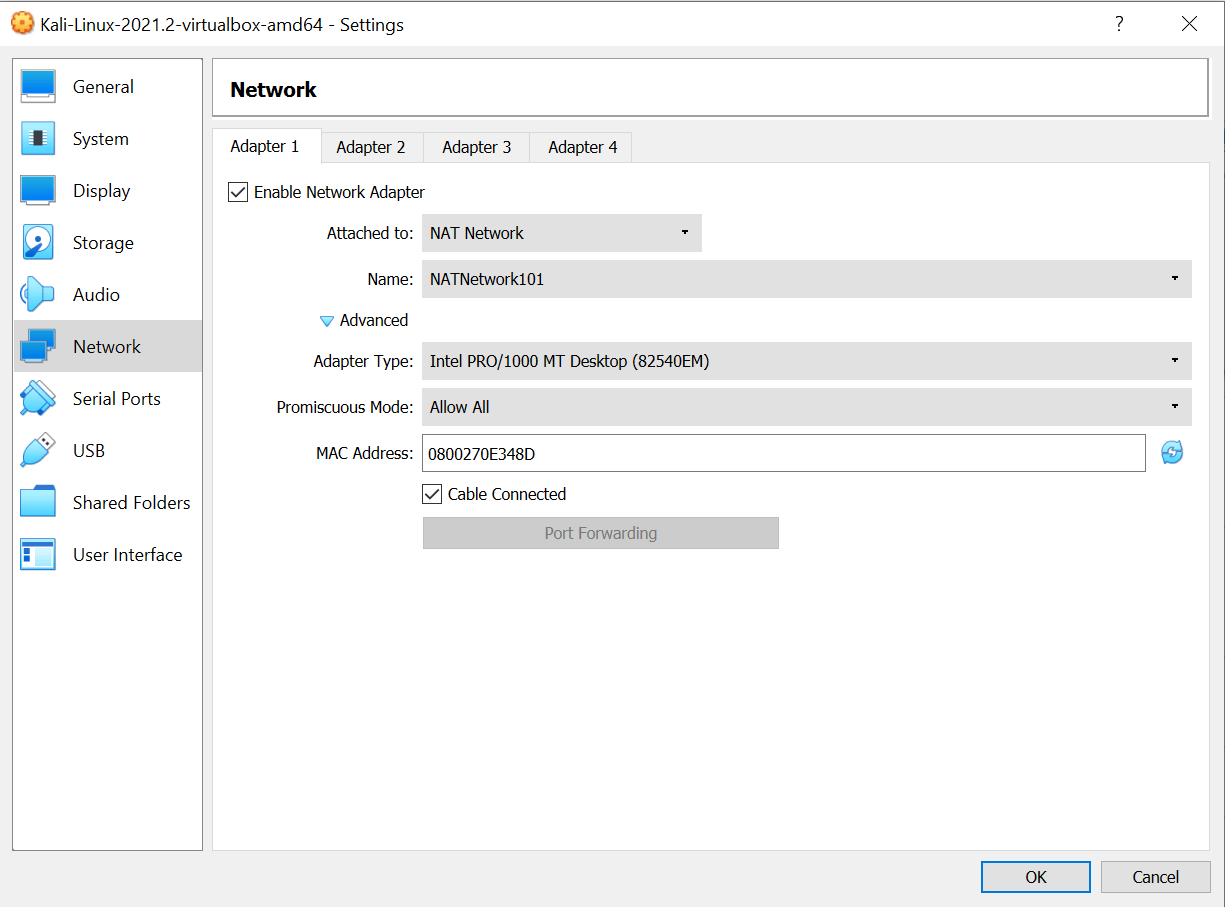
Once you have created NAT Network, assign the same for the VM Network.
Also you can use VBoxManage utility for the same if you are a command line hero.
## Assign NAT Network to a VM
$ VBoxManage modifyvm UbuntuVM --nic1 NATNetwork101
Wrap up
Add more VM’s in the same NAT Network and and test the access. This is one of the easiest way to create a Private Network kind of environment for isolated testing.
Gineesh Madapparambath
Gineesh Madapparambath is the founder of techbeatly. He is the co-author of The Kubernetes Bible, Second Edition and the author of Ansible for Real Life Automation. He has worked as a Systems Engineer, Automation Specialist, and content author. His primary focus is on Ansible Automation, Containerisation (OpenShift & Kubernetes), and Infrastructure as Code (Terraform). (Read more: iamgini.com)
Note
Disclaimer: The views expressed and the content shared in all published articles on this website are solely those of the respective authors, and they do not necessarily reflect the views of the author’s employer or the platform. We strive to ensure the accuracy and validity of the content published on our website. However, we cannot guarantee the absolute correctness or completeness of the information provided. It is the responsibility of the readers and users of this website to verify the accuracy and appropriateness of any information or opinions expressed within the articles. If you come across any content that you believe to be incorrect or invalid, please contact us immediately so that we can address the issue promptly.