How to install racadm for iDRAC on RHEL / Linux
-
 Gineesh Madapparambath
- Dell, Infrastructre & hardware, How to install racadm for i drac on rhel linux
- October 24, 2018
Dell has a beautiful tool for remote server management called iDRAC which is almost same like HPE iLO, but with different features. You can access iDRAC using GUI or via ssh. But what if you lost the login credentials for this iDRAC ? No need to worry, we have local racadm tool which we can use via windows or linux on the manged node. ( Remote racadm can be use same like ssh but still you need login credentials.)
Dell has a beautiful tool for remote server management called iDRAC which is almost same like HPE iLO, but with different features. You can access iDRAC using GUI or via ssh. But what if you lost the login credentials for this iDRAC ? No need to worry, we have local racadm tool which we can use via windows or linux on the manged node. ( Remote racadm can be use same like ssh but still you need login credentials.)
Download Local RACADM
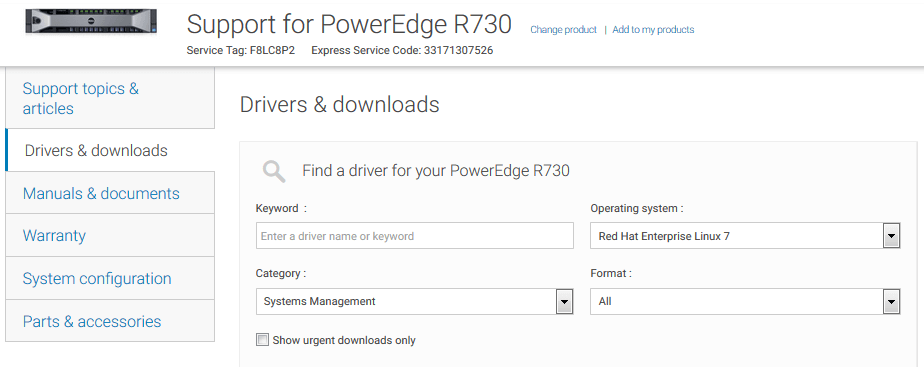
- Go to https://support.dell.com
- You can search for the hardware model or easily get the item by entering the service tag.
- Select Drivers and Downloads
- Select the Operating System of your Managed System
- Expand Systems Management .
- Locate the OpenManage Server Administrator Managed Node application
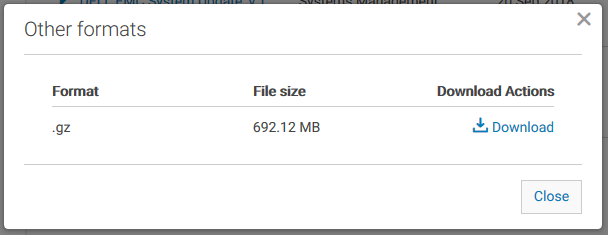
- Click Download File. (Or choose other formats)
So I choose below one which have all dependencies. (Its same like DVD with all installation dependencies inside)
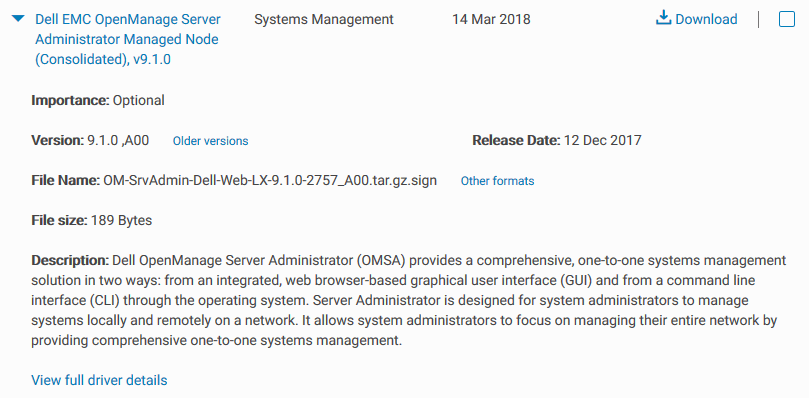
And click on that Other Formats
Transfer Installation File to Managed node and Extract it
Now transfer this file to your managed node (via ftp/scp/winscp) and extract to a directory.
# pwd
/root/OM-SrvAdmin-Dell-Web-LX-9.1.0-2757_A00
# ll
total 708868
drwxrwxrwx. 5 root   root            73 Oct 22  2017 linux
-rwxrwSrwx. 2 root   root        135258 Oct 22  2017 setup.sh
Goto linux/supportscripts
# cd /root/OM-SrvAdmin-Dell-Web-LX-9.1.0-2757_A00/linux/supportscripts
# pwd
/root/OM-SrvAdmin-Dell-Web-LX-9.1.0-2757_A00/linux/supportscripts
# ls -l
total 152
drwxrwxrwx. 2 root root    249 Oct 22  2017 prereqcheck
-rwxrwSrwx. 2 root root 135258 Oct 22  2017 srvadmin-install.sh
-rwxrwSrwx. 1 root root   5098 Oct 22  2017 srvadmin-services.sh
-rwxrwSrwx. 1 root root   4922 Oct 22  2017 srvadmin-uninstall.sh
Install RACADM Utility
Now run the srvadmin-install.sh
# ./srvadmin-install.sh
###########################################
Server Administrator Custom Install Utility
###########################################
Selected Options
Server Administrator CLI Interface
Dependencies
Server Instrumentation
Components for Server Administrator Managed Node Software:
[x] 1. Server Instrumentation
[ ] 2. Storage Management
[x] 3. Remote Access Core Component
[ ] 4. Remote Access SA Plugin Component
[ ] 5. Remote Enablement Interface
[ ] 6. Server Administrator Web Server Interface
[x] 7. Server Administrator CLI Interface
[ ] 8. Server Administrator SNMP Interface
[ ] 9. Server Administrator Operating System Log Interface
[ ] 10. All
Enter the number to select a component from the above list.
Enter c to copy selected components to destination folder.
Enter i to install the selected components.
Enter r to reset selection and start over.
Enter q to quit.
Enter : i
Installing the selected packages.
Choose whatever items you need to install; but make sure Remote Access Core Component has been selected. Wait for installation to finish.
warning: libsmbios-2.3.1-2757.12163.el7.x86_64.rpm: Header V4 DSA/SHA1 Signature, key ID 23b66a9d: NOKEY
warning: smbios-utils-bin-2.3.1-2757.12163.el7.x86_64.rpm: Header V4 DSA/SHA1 Signature, key ID 23b66a9d: NOKEY
warning: libsmbios-2.3.1-2757.12163.el7.x86_64.rpm: Header V4 DSA/SHA1 Signature, key ID 23b66a9d: NOKEY
Preparing…                          ################################# [100%]
Updating / installing…
   1:libsmbios-2.3.1-2757.12163.el7   ################################# [ 50%]
   2:smbios-utils-bin-2.3.1-2757.12163################################# [100%]
warning: srvadmin-cm-9.1.0-17.12.00.x86_64.rpm: Header V4 DSA/SHA1 Signature, key ID 23b66a9d: NOKEY
Preparing…                          ################################# [100%]
Updating / installing…
   1:srvadmin-omilcore-9.1.0-2757.1216################################# [  9%]
     **
     After the install process completes, you may need
     to log out and then log in again to reset the PATH
     variable to access the Server Administrator CLI utilities
 **********************************************************
2:srvadmin-deng-9.1.0-2757.12163.el################################# [ 18%]
   3:srvadmin-omacs-9.1.0-2757.12163.e################################# [ 27%]
   4:srvadmin-omcommon-9.1.0-2757.1216################################# [ 36%]
   5:srvadmin-xmlsup-9.1.0-2757.12163.################################# [ 45%]
   6:srvadmin-hapi-9.1.0-2757.12163.el################################# [ 55%]
   7:srvadmin-isvc-9.1.0-2757.12163.el################################# [ 64%]
   8:srvadmin-ominst-9.1.0-2757.12163.################################# [ 73%]
   9:srvadmin-omacore-9.1.0-2757.12163################################# [ 82%]
  10:srvadmin-rac-components-9.1.0-275################################# [ 91%]
  11:srvadmin-cm-9.1.0-17.12.00       ################################# [100%]
Select the format for Alert messages
    1. Enhanced Message Format       This format provides faster problem diagnosis and resolutions with streamlined and simplified messages.       This format also includes key information on defective components and standardized messages across       all Dell EMC Management interfaces. For example, Severity: Informational, Category, Audit MessageID:       MSG001: Message text with Substitution       NOTE: This may require a one-time change to your customized trap messages logic.    2. Traditional Message Format       This format is the existing legacy messages unchanged from the previous OMSA releases. This format       will soon be deprecated.    Dell EMC recommends adopting the Enhanced Message Format.
Do you want to set the messaging preference to Enhanced Message format?
Press ('y' for yes | 'n' for no ): y
Do you want to start Server Administrator services?
Press ('y' for yes | 'Enter' to exit): y
Starting instsvcdrv (via systemctl):                       [  OK  ]
Starting dataeng (via systemctl):                          [  OK  ]
iDRAC Management System
Dell EMC iDRAC is an out-of-band management system that allows system administrators
  to monitor and manage Dell EMC PowerEdge Servers and other network equipment, remotely.
  Dell EMC iDRAC works regardless of Power status and operating system functionality.
  For more information, visit http://pilot.search.dell.com/iDRAC
Verify PATH variable
Now, make sure your PATH is configured with racadm path; just source ~/.bashrc or run bash again. And verify the path is correct.
# echo $PATH
/root/perl5/bin:/usr/local/sbin:/usr/local/bin:/usr/sbin:/usr/bin:/bin:/sbin:/root/bin:/bin:/sbin:/opt/dell/srvadmin/bin:/opt/dell/srvadmin/sbin:/bin:/sbin
Test RACADM Utility
We are ready to try some racadm commands.
Check a user configuration
[root@ams-101]# racadm getconfig -u idracadmin
# cfgUserAdminIndex=3
cfgUserAdminUserName=idracadmin
# cfgUserAdminPassword=********** (Write-Only)
cfgUserAdminEnable=1
cfgUserAdminPrivilege=0x000001ff
cfgUserAdminIpmiLanPrivilege=15
cfgUserAdminIpmiSerialPrivilege=15
cfgUserAdminSolEnable=0
RAC1168: The RACADM "getconfig" command will be deprecated in a
future version of iDRAC firmware. Run the RACADM
"racadm get" command to retrieve the iDRAC configuration parameters.
For more information on the get command, run the RACADM command
"racadm help get".
Please note the cfgUserAdminIndex, which means the index number of user.
That’s it.
Refer How To Create A New User in iDRAC using RACADM as well.
Gineesh Madapparambath
Gineesh Madapparambath is the founder of techbeatly. He is the co-author of The Kubernetes Bible, Second Edition and the author of Ansible for Real Life Automation. He has worked as a Systems Engineer, Automation Specialist, and content author. His primary focus is on Ansible Automation, Containerisation (OpenShift & Kubernetes), and Infrastructure as Code (Terraform). (Read more: iamgini.com)
Note
Disclaimer: The views expressed and the content shared in all published articles on this website are solely those of the respective authors, and they do not necessarily reflect the views of the author’s employer or the platform. We strive to ensure the accuracy and validity of the content published on our website. However, we cannot guarantee the absolute correctness or completeness of the information provided. It is the responsibility of the readers and users of this website to verify the accuracy and appropriateness of any information or opinions expressed within the articles. If you come across any content that you believe to be incorrect or invalid, please contact us immediately so that we can address the issue promptly.