
If you have credits on Public cloud accounts, then you can use managed Kubernetes services such as GKE, AKS, EKS etc. But building self-hosted Kubernetes clusters are not straightforward tasks as there are many components to be installed and configured. But there are multiple ways to automate the kubernetes cluster deployment by using infrastructure as code (IaC) tool such as Vagrant and Terraform. In this article, you will learn how to deploy a multi-node Kubernetes cluster using Vagrant and VirtualBox. With this method you can deploy and destroy Kubernetes clusters whenever you needed.
Prerequisites
- Vagrant installed
- VirtualBox installed
- Ansible installed (If you are on Windows, then you can use
ansible_localas Ansible is not available to install on Windows. Check the steps to cover this)
Prepare the environment
You need to create your Vagrantfile with necessary instructions and in this case you can use the code from ginigangadharan/vagrant-iac-usecases repository.
Clone the repository and switch to virtualbox-kubernetes directory.
$ git clone https://github.com/ginigangadharan/vagrant-iac-usecases
$ cd vagrant-iac-usecases/virtualbox-kubernetes
Check your Vagrantfile and other files such as Ansible playbooks.
Explaining the Vagrantfile content
IMAGE_NAME = "bento/ubuntu-16.04"can be changed with other versions. (Try and report issues if any)NODES = 2defines the number of worker nodes in the cluster. Based on this value, Vagrant will create multiple node automatically.CLUSTER_NAME = "demo"can be changed if you need another cluster in the same workstation (cluster name will be prefixed with VM name to identify)APISERVER_ADVERTISE_ADDRESS = "192.168.56.50"andNODE_IP_ADDRESS_RANGE = "192.168.56"are used based onvboxnet12Host-only adaptor. If you using different network, then change this IP accordingly.- Required ports already forwarded as follows
        config.vm.network "forwarded_port",
        guest: 8001,
        host:  8001,
        auto_correct: true

        config.vm.network "forwarded_port",
        guest: 30000,
        host:  30000,
        auto_correct: true

        config.vm.network "forwarded_port",
        guest: 8443,
        host:  8443,
auto_correct: true- Ansible will be used as provisioner as follows. If you are on Windows, then instruct Vagrant to use
ansibleinside the guest VM itself by changingnode.vm.provision "ansible"tonode.vm.provision "ansible_local".
            node.vm.provision "ansible" do |ansible|
                ansible.playbook = "kubernetes-setup/node-playbook.yml"
                ansible.extra_vars = {
                    node_ip: APISERVER_ADVERTISE_ADDRESS,
                    apiserver_advertise_address: APISERVER_ADVERTISE_ADDRESS
                }
            end
Create the Kubernetes cluster using Vagrant
Build the cluster using Vagrant (Make sure you are inside virtualbox-kubernetes directory)
$ vagrant upOnce Vagrant finished the VM creation and Ansible provisioning, check your VirtualBox GUI for the virtual machines. You can also verify the VM status using Vagrant as follows.
$ vagrant status
Current machine states:

k8s-master                running (virtualbox)
node-1                    running (virtualbox)
node-2                    running (virtualbox)

This environment represents multiple VMs. The VMs are all listed
above with their current state. For more information about a specific
VM, run `vagrant status NAME`.
Configure Kubernetes cluster
You can access the Vagrant VMs using vagrant ssh command. Login to the master node as follows.
$ vagrant ssh k8s-master
Welcome to Ubuntu 16.04.6 LTS (GNU/Linux 4.4.0-185-generic x86_64)

 * Documentation:  https://help.ubuntu.com
 * Management:     https://landscape.canonical.com
 * Support:        https://ubuntu.com/advantage


127 packages can be updated.
97 updates are security updates.


This system is built by the Bento project by Chef Software
More information can be found at https://github.com/chef/bento
Last login: Mon Jan 17 03:49:16 2022 from 10.0.2.2
vagrant@demo-k8s-master:~$
Configure KUBECONFIG to access the cluster and check cluster nodes.
vagrant@demo-k8s-master:~$ export KUBECONFIG=$HOME/.kube/config

vagrant@demo-k8s-master:~$ kubectl get nodes
NAME          STATUS     ROLES                  AGE     VERSION
demo-node-1   NotReady   <none>                 3m25s   v1.23.1
demo-node-2   NotReady   <none>                 36s     v1.23.1
k8s-master    NotReady   control-plane,master   7m54s   v1.23.1
You can see the NotReady status on nodes as the cluster networking is not up yet.
Deploy Kubernetes networking
Once the cluster is up and running you need to deploy the Kubernetes networking and in this case we will be using Calico
vagrant@demo-k8s-master:~$ cd /vagrant/
vagrant@demo-k8s-master:/vagrant$ kubectl create -f calico.yaml
Wait for few minutes until Calico pods are up and running.
vagrant@demo-k8s-master:/vagrant$ kubectl get po -n kube-system |grep calico
calico-kube-controllers-d4bfdcb9-ln8lm   1/1     Running   0          6m53s
calico-node-gv56w                        1/1     Running   0          6m53s
calico-node-xwxhz                        1/1     Running   0          6m53s
calico-node-zlkxs                        1/1     Running   0          6m53s
Verify DNS pods
vagrant@demo-k8s-master:/vagrant$ kubectl get po -n kube-system | grep dns
coredns-64897985d-dx6qg                  1/1     Running   0          19m
coredns-64897985d-g4zg9                  1/1     Running   0          19m
Access Kubernetes cluster from host
Instead of accessing the cluster from master nodes, you can access the same cluster from your host machine (Laptop or workstation).
Copy the Kubernetes config file from master node (virtual machine) to host. (I am using vagrant scp command here; feel free to use any method to transfer the file)
$ vagrant scp k8s-master:/home/vagrant/.kube/config ~/.kube/demo-cluster
config                                                                     100% 5641     1.1MB/s   00:00
Set KUBECONFIG environment variable.
$ export KUBECONFIG=~/.kube/demo_cluster Verify access to the cluster. (Make sure you have installed kubectl on your host machine)
$ kubectl get po -A
NAMESPACE              NAME                                         READY   STATUS    RESTARTS   AGE
kube-system            calico-kube-controllers-d4bfdcb9-p2pmd       1/1     Running   0          28m
kube-system            calico-node-qzs2m                            1/1     Running   0          28m
kube-system            calico-node-rdfhp                            1/1     Running   0          28m
kube-system            calico-node-tf29b                            1/1     Running   0          28m
kube-system            coredns-64897985d-6hmbr                      1/1     Running   0          37m
kube-system            coredns-64897985d-hxgf5                      1/1     Running   0          37m
kube-system            etcd-k8s-master                              1/1     Running   0          37m
kube-system            kube-apiserver-k8s-master                    1/1     Running   0          37m
kube-system            kube-controller-manager-k8s-master           1/1     Running   0          37m
kube-system            kube-proxy-g692n                             1/1     Running   0          34m
kube-system            kube-proxy-vkl62                             1/1     Running   0          37m
kube-system            kube-proxy-zj546                             1/1     Running   0          30m
kube-system            kube-scheduler-k8s-master                    1/1     Running   0          37m
kube-system            metrics-server-6c49cf6978-ccprv              0/1     Running   0          11m
kubernetes-dashboard   dashboard-metrics-scraper-799d786dbf-hl4lw   1/1     Running   0          24m
kubernetes-dashboard   kubernetes-dashboard-6b6b86c4c5-hnsqq        1/1     Running   0          24m

$ kubectl get nodes
NAME          STATUS   ROLES                  AGE   VERSION
demo-node-1   Ready    worker                 34m   v1.23.1
demo-node-2   Ready    worker                 30m   v1.23.1
k8s-master    Ready    control-plane,master   37m   v1.23.1
Install and access Kubernetes dashboard
This is an optional step in case you need to access Kubernetes dashboard from your local machine.
Check documentation for latest version of Kubernetes dashboard.
vagrant@demo-k8s-master:/vagrant$ kubectl apply -f https://raw.githubusercontent.com/kubernetes/dashboard/v2.2.0/aio/deploy/recommended.yamlCopy Token Value from below command
vagrant@k8s-master:~$ KUBETOKEN=$(kubectl -n kube-system get secret | grep default-token | awk '{print $1}')Copy Token Value
vagrant@demo-k8s-master:/vagrant$ kubectl -n kube-system describe secret ${KUBETOKEN} | grep token: | awk '{print $2}'Note: You can also create a seperate user for accessing the dashboard; refer Creating Sample User documentation.
Enable proxy
vagrant@demo-k8s-master:/vagrant$ kubectl proxy --address='0.0.0.0'
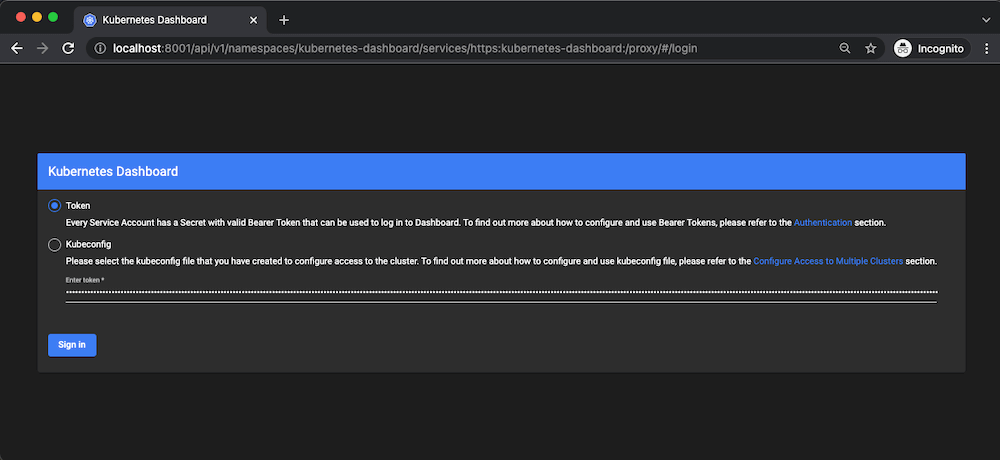
Starting to serve on [::]:8001Now you can open the url http://localhost:8001/api/v1/namespaces/kubernetes-dashboard/services/https:kubernetes-dashboard:/proxy/ from you host machine browser (Port forwarding has been enabled as part of Vagrantfile) and login with the token which you have copied from previous command.
Housekeeping
Once you finished testing, you can destroy the entire cluster to save disk space and resources. If you need the cluster for few more days, then you can simply shutdown the virtual machines and start it back whenever needed.
$ vagrant destroy
    node-2: Are you sure you want to destroy the 'node-2' VM? [y/N] y
==> node-2: Forcing shutdown of VM...
==> node-2: Destroying VM and associated drives...
    node-1: Are you sure you want to destroy the 'node-1' VM? [y/N] y
==> node-1: Forcing shutdown of VM...
==> node-1: Destroying VM and associated drives...
    k8s-master: Are you sure you want to destroy the 'k8s-master' VM? [y/N] y
==> k8s-master: Forcing shutdown of VM...
==> k8s-master: Destroying VM and associated drives...
Check the ginigangadharan/vagrant-iac-usecaseshttps://github.com/ginigangadharan/vagrant-iac-usecases repository for more Vagrant sample use cases.
Disclaimer:
The views expressed and the content shared in all published articles on this website are solely those of the respective authors, and they do not necessarily reflect the views of the author’s employer or the techbeatly platform. We strive to ensure the accuracy and validity of the content published on our website. However, we cannot guarantee the absolute correctness or completeness of the information provided. It is the responsibility of the readers and users of this website to verify the accuracy and appropriateness of any information or opinions expressed within the articles. If you come across any content that you believe to be incorrect or invalid, please contact us immediately so that we can address the issue promptly.
Tags:
Latest posts


Comments
4 Responses
Leave a Reply
[…] Create Multi-node Kubernets Cluster in 10 minutes (using Vagrant and Ansible) […]
Hi,
great guide! I have successfully installed a 2 node cluster on virtualbox 6.1.32 in Windows 11. I can create pods, view them and do various operations without problems. I can’t ssh access the pods. When I launch “kubectl exec -it nginx – sh” (for example), I get the message “Error from server: no preferred addresses found; known addresses: []”. Some idea?
Best regards
i found the solution: “kubectl get nodes -o wide” return in the INTERNAL-IP of node (master is correct 192.168.56.50)
the problem is in the ip of the nodes defined here /etc/default/kubelet change this and restart kubelt solves the problem
sudo systemctl daemon-reload
sudo systemctl restart kubelet
Wonderful! glad to know that you found a solution 🙂