
Red Hat Satellite Server – Connected Installation Method – Part 1 – Prepare Server

Introduction
Red Hat Satellite is one of the best system management solutions by which you can deploy, configure, and maintain your systems; it can be physical, virtual, or cloud environments. Satellite is single pane tool for provisioning, remote management and monitoring of multiple Red Hat Enterprise Linux deployments.
Red Hat Satellite Server – Installation Guides
- Red Hat Satellite Server – Connected Installation Method – Part 1 – Prepare Server
- Red Hat Satellite Server – Connected Installation Method – Part 2 – Configure Satellite
- Red Hat Satellite Server – Disconnected Installation Method – Part 1 – Prepare Server
- Red Hat Satellite Server – Disconnected Installation Method – Part 2 – Configure Satellite
Prerequisites
Basically we need a single server for Satellite and it can serve all of your clients. But as part of fallback and workload balancing, we can have additional capsule servers which are disconnected from internet but always talk to Satellite Server.
- 1 x Connected Satellite server (Primary – Will only talk to internet for package download)
- 1 x (or more) disconnected Satellite server (Secondary – Will talk to end clients for patching, provisioning etc)
- Follow System requirements, Storage requirements, firewall & port requirement (Preparing your Environment for Installation).
Register the server to RHSM
subscription-manager registerList the subscription
subscription-manager list --all --available --matches 'Red Hat Satellite Infrastructure Subscription'

## Or
subscription-manager list --available |grep "Subscription Name"
Select the particular subscription and attach the pool
(Replace the POOL_NAME in below command)
subscription-manager attach --pool=POOL_NAMEVerify the consumed subscription.
subscription-manager list --consumedDisable all repositories
subscription-manager repos --disable "*"Enable the Satellite repos.
subscription-manager repos --enable=rhel-7-server-rpms \
--enable=rhel-7-server-satellite-6.9-rpms \
--enable=rhel-7-server-satellite-maintenance-6-rpms \
--enable=rhel-server-rhscl-7-rpms \
--enable=rhel-7-server-ansible-2.9-rpms
Enable the repos.
yum clean all
yum repolist enabled
Perform yum update before satellite installation
yum updateInstall satellite packages
yum install satelliteVerify DNS
Make sure Fully Qualified hostname is configured before installing satellite. Output for hostname -f command should display hostname with FQDN.
Install Satellite
his process will take 20-30 minutes. Replace ORGANIZATION_NAME as needed.
satellite-installer --scenario satellite --foreman-initial-organization "ORGANIZATION_NAME" --foreman-initial-location "Singapore" --foreman-initial-admin-username admin --foreman-initial-admin-password redhatEnable Firewall
firewall-cmd \
--add-port="80/tcp" \
--add-port="443/tcp" \
--add-port="5674/tcp" \
--add-port="8000/tcp" \
--add-port="8140/tcp" \
--add-port="9090/tcp" \
--add-port="53/udp" \
--add-port="53/tcp" \
--add-port="67/udp" \
--add-port="69/udp" \
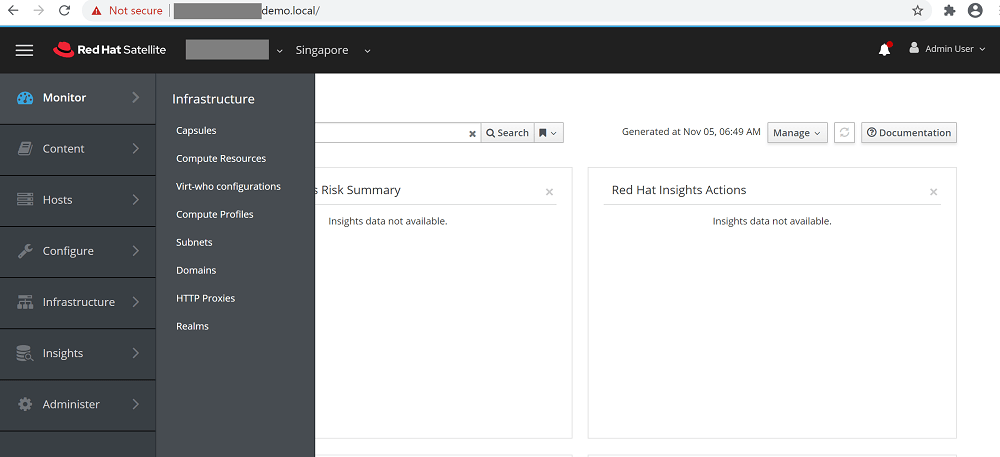
--add-port="5000/tcp"Verify Satellite Console Access
Open Red Hat Satellite Web Console and verify access
Disclaimer:
The views expressed and the content shared in all published articles on this website are solely those of the respective authors, and they do not necessarily reflect the views of the author’s employer or the techbeatly platform. We strive to ensure the accuracy and validity of the content published on our website. However, we cannot guarantee the absolute correctness or completeness of the information provided. It is the responsibility of the readers and users of this website to verify the accuracy and appropriateness of any information or opinions expressed within the articles. If you come across any content that you believe to be incorrect or invalid, please contact us immediately so that we can address the issue promptly.
Tags:
Latest posts


Comments
3 Responses
Leave a Reply
[…] Red Hat Satellite Server – Connected Installation Method – Part 1 – Prepare Server […]
[…] Red Hat Satellite Server – Connected Installation Method – Part 1 – Prepare Server […]
[…] Red Hat Satellite Server – Connected Installation Method – Part 1 – Prepare Server […]